The post The Crispiest & Gut Friendly Brussels Sprouts You’ll Ever Taste – Ready in 15! appeared first on Caroline Høgh Groth.
]]>I’m here to change your perception and judgment of the humble brussels sprouts and if you’re already a brussels lover? Well, then I might even make you fall even harder and deeper in love with them with this recipe.
I’ve got to let you in on the secret to getting crispy brussels sprouts in a matter of minutes though – it’s all thanks to the new Ninja Foodi which is literally a comprehensive ‘kitchen-system’ that includes the multiple cooking functions like; grilling, steaming, baking, roasting, pressure cooking, air frying and slow cooking up to 70% faster than traditional methods, without losing the integrity of your favourite flavour-filled dishes.
And although Ninja did contact me to try this new compact kitchen machine out, initially I was sceptic, but I can genuinely say I’ve fallen head over heels with the ease, efficacy and taste that this machine brings to my meals. I’m especially looking forward to using it for winter to cook soups, casseroles and stews that are hearty and warm – especially gut-friendly ones, as cooked vegetables and cooked meats are a must if you’re dealing with a poor digestion (raw food is simply too hard on it) – to come home to after a long day out.
The smart thing about the Ninja Foodi is that it has several functions as described above. But, the other really clever things is that you can cook a whole meal in one go. This is a super smart thing for anyone who doesn’t have extensive time to spend in the kitchen or maybe just don’t want to? It truly does seal in the flavour and moisture like nothing else, and the salmon fillet I cooked with this recipe (below) is one of the most moist fillets I’ve ever tasted.
The one thing I’ve also come to discover is this; the manual is a little overwhelming in the beginning because there are so many different functions and uses to this machine (hence why it’s so comprehensive), but once you actually just start playing around with it, you’ll quickly realise it’s really darn hard to mess it up, even if you try to be really ‘fancy’ and make an inventive meal, it just somehow works. Even Pash can figure out how to operate it and cook when I’m not home to ‘put the bacon on the table’, and it takes only a few minutes to clean with soap & warm water.
I wanted to showcase a recipe that’s in season, because I believe it’s so important to eat what’s seasonally fresh and available to us – both for our bodies but also for the environment around us as it has far less impact on it that way.
In Australia, its’ Brussels Sprouts season currently and they’re super duper cheap – I’m talking a kilo for $5-$7. The same goes for broccoli and then simply adding a (skin off) fillet of salmon to the pot and you have yourself a healthy, gut-friendly and easy meal that can be prepared by anyone.

Ingredients:
- 1 piece of skin-off salmon fillet
- 150 grams of brussels sprouts (stems removed, halved)
- 4 florets of broccoli
- 1/4 avocado
- 1 tsp toasted sesame oil
- 1 tsp flaxseed oil
- 2 cups of water
- 1/2 lemon
- Hemp Seeds
- Pepitas
Directions:
- Pre-heat your Ninja Foodi on air-crisping mode for 2-3 minutes.
- Add the brussels sprouts to a bowl and lightly coat in a little toasted sesame oil & salt and pepper.
- Add them to the AIR FRYING basket, and set the Air Crisper Setting to 15 minutes.
- After 7 minutes, toss the brussels sprouts in the air frying basket, and create a little ‘hole’ in the middle.
- Add the salmon fillet (with salt & pepper) in between the brussels sprouts and keep air-crisping for another 7-8 minutes.
- Add 2 cups of water to the POT and add the AIR-FRYING basket.
- Add your broccoli & put on the steaming-lid. Keep the vent open.
- Hit steam & leave it for about 5 minutes so it’s lightly steamed, but still with a slight crunch to the bite.
- Arrange all on a plate, and add avocado, 1/2 lemon, hemp seeds & pepitas, drizzle with flaxseed oil.
With Mother’s Day Coming Up, This Is The PERFECT Gift.
Use The Discount Code
GROTHFOODI
to receive $60 off RRP + Free Delivery x
CLICK HERE
The post The Crispiest & Gut Friendly Brussels Sprouts You’ll Ever Taste – Ready in 15! appeared first on Caroline Høgh Groth.
]]>The post Adaptogen Superfood Protein Balls appeared first on Caroline Høgh Groth.
]]>Sometimes my recipes turn out great, other times.. not so much. But that’s a little bit like life, right? Better to have tried and failed than to never have tried at all..
Let’s get straight into it..
I whipped up these oh-so delicious and easy Adaptogenic Superfood Protein Balls in a jiff and I’m obsessed (currently on my 3rd ball writing this), so naturally I wanted you to join in on the yumminess.
What are adaptogens? Adaptogens are unique plants or herbs that support your adrenal system. They help balance your hormones, so you can manage your stress response on a day to day basis. Just like the word indicates, they adapt to what your body needs and have the ability to regulate your system up or down depending on the given need in the moment. Fancy, huh?
I’ve been a fan of adaptogens (ashwagandha, chaga, cordyceps, holy basil, maca, mucuna pruriens, reishi) for a long time, but it finally seems that the world has now caught onto their incredible benefits to our health and have started showing interest in what these incredible herbs can do for them when incorporated into a balanced and healthy diet.
Incorporating the adaptogens into a Protein Ball is smart because most of those herbs are far from pleasant in taste (besides from Maca), so you want to mix them with something that is slightly overpowering in taste.
Not to worry, I’ve thought about all of that for you. These balls will give you a good boost of protein and all the superfoods and adaptogens you need to get a morning or afternoon pick-me-up whilst still treating yourself to something yummy.
Makes 12 balls (vegan & gluten-free)
Ingredients:
- 1/2 cup coconut flour
- 1/2 cup pitted & soaked dates
- 3 tbsp black chia seeds
- 3 tbsp caco nibs
- 2 tbsp maca
- 1 tbsp ashwaganda
- 2 tbsp adaptogen plant protein
- 2 tbsp macadamia/cashew butter
- 1 tbsp coconut syrup
- 2 tbsp almond milk
Directions:
- Add all ingredients to a food processor and blend on high, scraping down the sides, until you get a mixed paste.
- Roll 12 balls in your hands from the paste and arrange on a plate.
- Store in the fridge in an airtight container for up to 4 days.


The post Adaptogen Superfood Protein Balls appeared first on Caroline Høgh Groth.
]]>The post RAW CHOCOLATE PEANUT BUTTER BALLS appeared first on Caroline Høgh Groth.
]]>You were all hounding me for this recipe after popping up the photos on my Instagram Stories last night, so here it is for you all.
I love, love, love healthy and easy snacks that are quick to make at home, and best of all; doesn’t cost you a fortune either!
Yesterday I was really in the mood for something sweet – and this was even after having had sticky-rice ice cream (oops!), so I whipped up these healthy Raw Chocolate Peanut Butter Balls for Pash and myself, and it only took me 15 minutes – no joke!
We had one each, and popped the rest in the fridge – plenty for the next few weeks ahead.
These are completely vegan, diary-free, gluten-free & refined sugar-free.
The below recipe will give you about 24 balls or so – depending on how big or small you roll them.
Raw Chocolate Peanut Butter Balls:
Ingredients:
- 1 cup pitted dates
- 1/2 cup sunflower seeds (can substitute with any seeds or nuts)
- 2 tbsp peanut butter (can substitute with any nut butter or leave it out completely)
- 6 tbsp raw cacao
- 3 tbsp desiccated coconut + more for rolling.
- 1/2 cup rolled oats
- 2 tbsp coconut oil
- water
Directions:
- Add all ingredients to a food processor or blender and blend until almost smooth. I like it a bit chunky, but you can blend for as long as you want to.
- Add more water if it’s not blending properly, but not too much as you don’t want to mixture too soggy.
- Roll the mixture into little balls and roll them in desiccated coconut afterward.
- Store in an airtight container in the fridge.
Let me know in the comments what you think, if you do decide to make them at home.
They’re super easy, and even the fussiest eaters will love these – promise!

The post RAW CHOCOLATE PEANUT BUTTER BALLS appeared first on Caroline Høgh Groth.
]]>The post Pink Pitaya Protein Bowl appeared first on Caroline Høgh Groth.
]]>And you know what else is a YES?! Same-sex marriage in Australia as of today. Today was a DAMN good day for humankind!
I’ve been a bit slack with my recipe creations (I’m so sorry, as I know you love the simplicity of what I normally create), but for a little while I lost my creative mojo, but now I’m back again. And I promise I won’t go away again. Well, at least for now – expect to see a lot more fun, easy and healthy recipes coming up in the next little while.
For today, I’ve created a pink pitaya protein bowl for you all. Pink pitaya is also known as ‘dragonfruit’, and is rich in Vitamin C, Antioxidants, good fatty acids and B Vitamins as well as carotene and protein. Superfood? I think, YES!
Have this bowl for breakfast or even just have it as a drink (without the toppings) for an in-between-meal snack. It works both ways. If you want to keep it lighter, leave out the protein.
If you’re wondering where to get the Pink Pitaya from? This Organic one is from THR1VE which you can order with their home-delivery meals.
Ingredients:
– 1/2 cup frozen berries
– 1 small mango
– 1/2 ripe banana + 1/2 to decorate
– 1 serving of pink pitaya
– 1 cup coconut milk
– 1 tbsp pistachios + more to decorate
– 1 tbsp goji berries+ more to decorate
– Handful of ice-cubes
– Strawberries to decorate
– Blueberries to decorate
![]()
Method:
– Add all ingredients to a blender
– Blend at high speed for 10 seconds
– Add ice-cubes and blend for another 10 seconds
– Pour into a bowl and decorate with fruits, nuts and seeds or put it in a air-tights jar and bring it with you as a snack. Keep it refrigerated and cold.

Let me know if you create it at home and what you think?
Would also love to hear which type of recipes you’d want me to create?
ENJOY!
Caroline xx
The post Pink Pitaya Protein Bowl appeared first on Caroline Høgh Groth.
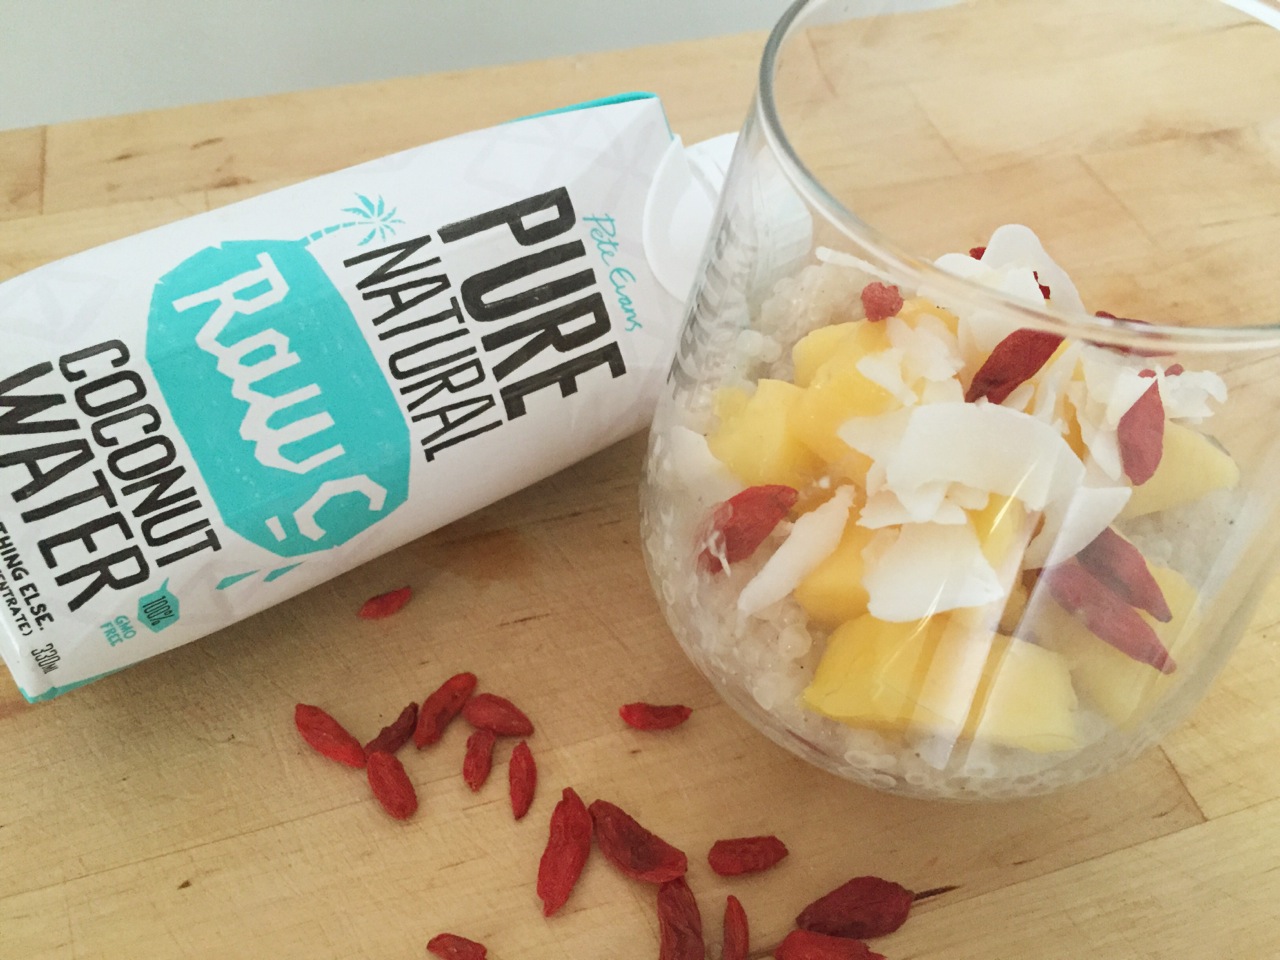
]]>The post Vegan Coconut Tapioca Pudding with Fresh Mango, Coconut Chips & Goji Berries. appeared first on Caroline Høgh Groth.
]]>Have you ever tried Tapioca? It’s made from the root of the cassava plant and it has a unique compositions of carbs, vitamins, mineral, and organic compounds. It’s a rich source of fiber, the good cholesterol and protein. Because of the high dietary fiber it contains this little seed is great for your digestive health.
However, enjoy this dessert in smaller quantities if you’re trying to lose weight because of the high carb level. Doesn’t mean it can’t be a weekly treat :) Enjoy!
(Serves 6) (Vegan, Gluten-free, Refined sugar-free, Nut-free)
Ingredients:
- ¾ cup Natural Raw C Coconut water
- 3 tbsp Dark Agave Syrup
- 1 tbsp rice malt syrup
- 1 cup seed tapioca
- 1 tsp cinnamon
- ½ can organic coconut cream
- 1 large fresh mango, diced
- Coconut chips
- Goji Berries
Directions:
- To make the syrup, bring coconut water, agave syrup & rice malt syrup to a boil, then let it simmer for about 15 minutes until it has thickened slightly. Set aside.
- In a large saucepan, bring 4 cups of water to the boil. Add the seed tapioca, and let it simmer for about 10-15 minutes, or until seed is translucent. Drain and rinse with cold water.
- Combine seed tapioca, syrup and coconut cream and mix well.
- Set aside in fridge for at least 1 hour.
- Serve in small glasses with fresh mango, coconut chips and goji berries.


The post Vegan Coconut Tapioca Pudding with Fresh Mango, Coconut Chips & Goji Berries. appeared first on Caroline Høgh Groth.
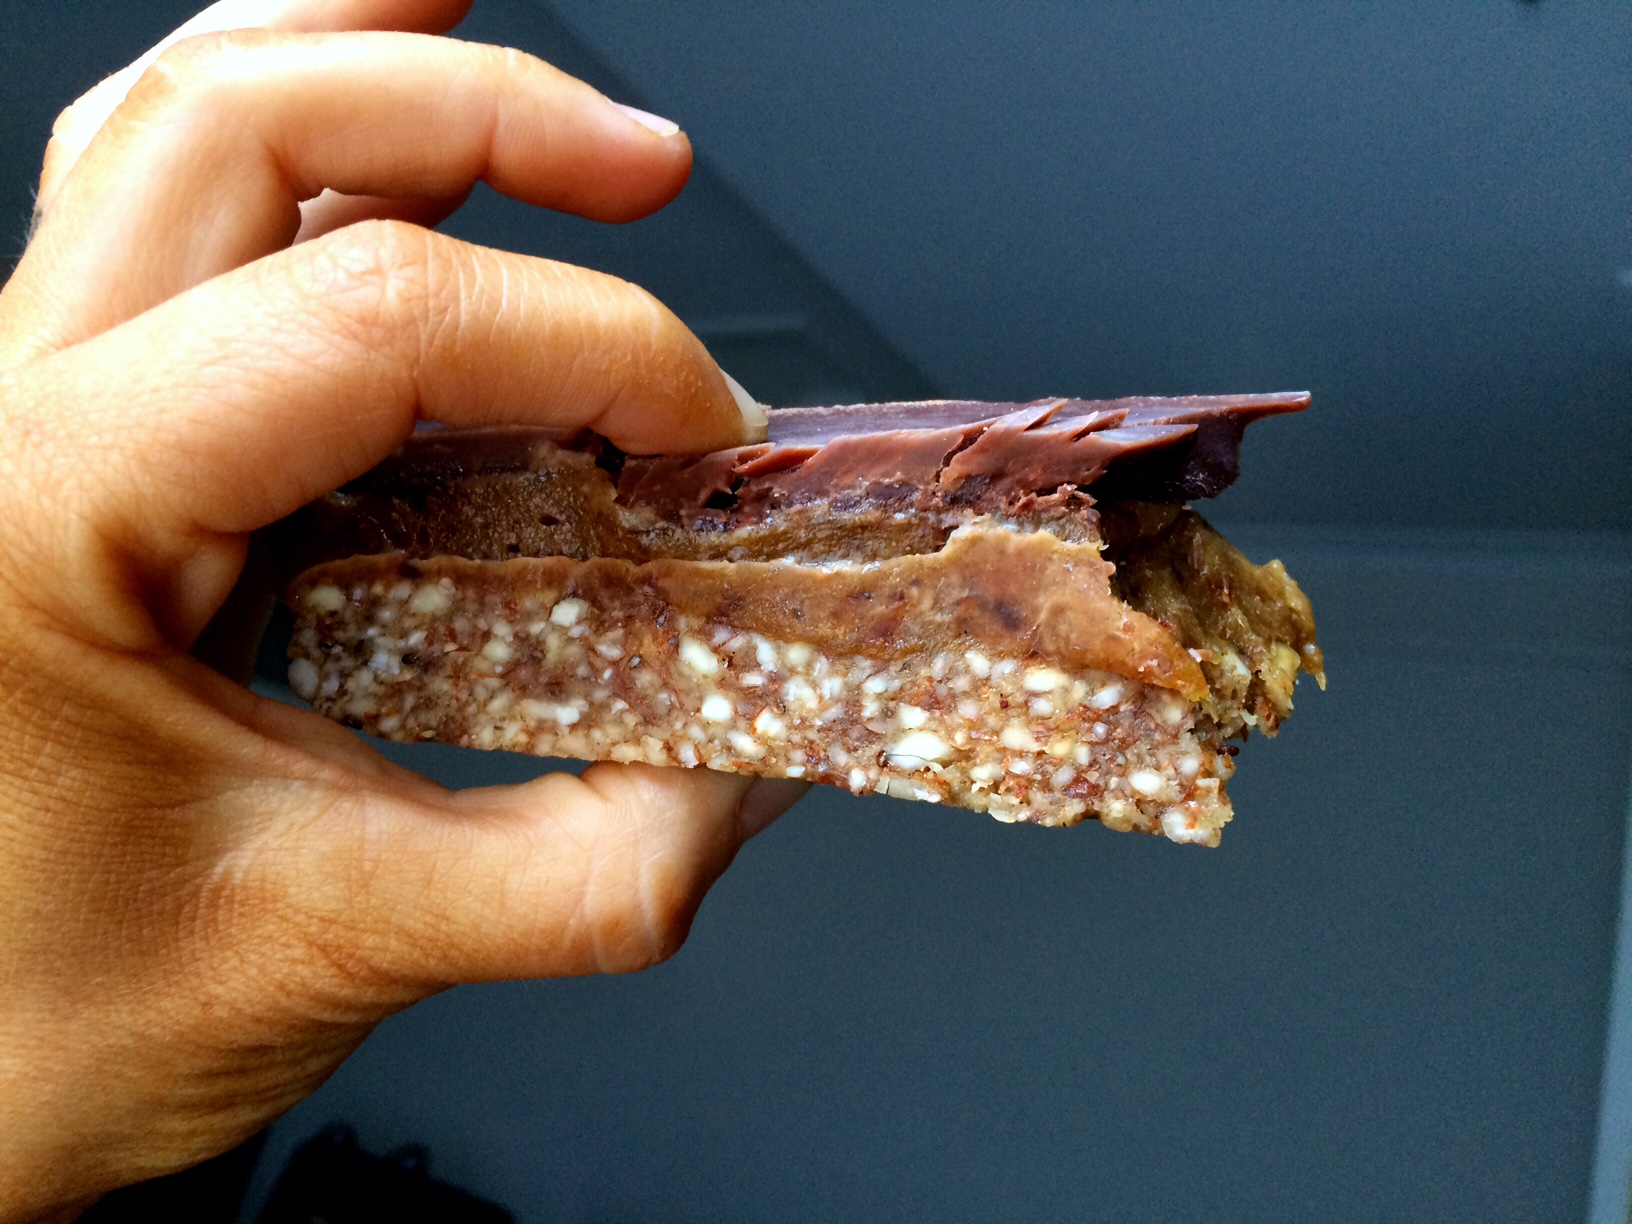
]]>The post Vegan Raw Salted Caramel Slice appeared first on Caroline Høgh Groth.
]]>This new take on my caramel slice came about when my dear colleague, Catherine, had her birthday last week and requested if I could please make one of my raw desserts for our afternoon-tea in the office.
That night I set out to improve and develop my caramel slice and came up with the SALTED caramel slice with quite a few edits to my regular one that just made it so much better – I was really pleased with the outcome of this one :)
The Raw Salted Caramel Slice is all vegan, sugar-free, dairy-free, gluten-free and egg-free and incredibly nutritious and good for you – you won’t believe these words when you bite into it, but please do :)
Ingredients:
Base:
- 1 cup raw almonds
- 1 tbsp raw almond and chia seed butter
- 1 tsp vanilla bean paste
- 2 tbsp Almond Breeze Unsweetened Almond Milk
- 1 tsp Coconut Oil
Caramel:
- 2 cups medjool dates (soaked, drained)
- 1 tbsp peanut butter
- 1 tbsp tahini
- 1 tsp brown rice malt syrup
- 1 tsp vanilla bean paste
- 1/2 tsp (or to taste) Naked Foods Celtic Sea Salt
- 1 tbsp Almond Breeze Unsweetened Almond Milk
Raw Chocolate:
- 60g organic cacao butter
- 2 tbsp Loving Earth Raw Cacao Powder
- 1 tsp vanilla bean paste
- 3 tbsp coconut oil
- Sweetener if you prefer
Directions:
To make the base:
- Process the raw almonds in a food processors. Transfer to a bowl
- Add the almond & chia butter, vanilla, coconut oil and almond milk to the bowl with the processed raw almonds and use your hands to combine this mixture until it sticks together.
- Take a medium sized bread-tin and spread with coconut oil in the bottom and on the sides – transfer the almond-mixture base to the tin and press evenly into the bottom of the tin. Set in the freezer.
To make the caramel:
- Add the medjool dates, peanut butter, tahini, brown rice malt syrup, vanilla, sea salt and almond milk in a food processor/blender and process until a smooth paste appears.
- Take your base-layer from the fridge and spoon the caramel-paste onto the base-layer. Set aside in freezer.
To make the raw chocolate:
- Melt the cacao butter at a very, very low heat in a small saucepan. Combine the rest of the ingredients and whisk until everything is combined thoroughly.
- Pour over the base & caramel-layer and set aside in the freezer – let it set for at least 4 hours (depending on your freezer) before you enjoy it :) Keep it in the freezer when not being consumed.
Enjoy!
The post Vegan Raw Salted Caramel Slice appeared first on Caroline Høgh Groth.
]]>The post Vegan Protein Cacao Crunch Cups (V) (VF) (SF) (GF) (DF) (EG) appeared first on Caroline Høgh Groth.
]]>However, yesterday I was in the mood to work on a little something for you all after an inspirational & delicious lunch!
Let me introduce to you: The Vegan Protein Cacao Crunch Cups! Vegan, Sugar-free, Gluten-free, Dairy-free, Egg-free deliciousness that’s actually good for your insides. If you have all the staple ingredients, it takes about 15 minutes to create these little cups of deliciousness. Great for kids too as they’re gooey and crunchy at the same time.
Ingredients:
Base:
- 1 cup roasted almonds
- 3 tbsp organic coconut oil (I use H2COCO)
- Dash of rock salt
- 1 scoop of Bodyscience Vanilla Vegan Protein
- 4 tbsp organic almond milk
Middle-layer:
- 2 cups pitted dates (soaked & drained)
- 1 handful shredded coconut
- 1 scoop of Bodyscience Vanilla Vegan Protein
- Dash of rock salt
- 1 tbsp organic coconut oil (I use H2COCO)
- 4 tbsp organic almond milk
- 1 handful raw cacao nibs (I use Loving Earth)
Chocolate-layer:
- 1/4 cup organic coconut oil (I use H2COCO)
- 4 heaped tbsp organic raw cacao (I use Loving Earth)
- Dash of rock salt
- 1/2 tsp vanilla bean paste
- 1 tbsp organic coconut butter
- 1 tsp rice malt syrup (optional for sweeter chocolate)
Directions:
Base:
1. In a blender, ground the almonds until it’s a fine crumble. Add to a big bowl.
2. Add the rest of the ingredients to the bowl with the almond crumble and press firmly together. If it doesn’t stick, add a bit more coconut oil.
3. In a 6-piece muffin-form divide the paste between the 6 forms and press down firmly. Put aside.
Middle-layer:
1. In a blender, add all ingredients and blend until a fine and smooth paste. Add on top of the base-layer in the muffin-forms and sprinkle with a bit of cacao-nibs on the top. Set in the freezer
Chocolate-layer:
1. Add all ingredients to a small saucepan over low heat and keep stirring. When all ingredients have melted and are well whisked together, pour the chocolate over the already-made layers in the muffin-form. Back into the freezer and let them set for at least 2 hours before you eat them. Keep them in the freezer at all times and ENJOY :)
The post Vegan Protein Cacao Crunch Cups (V) (VF) (SF) (GF) (DF) (EG) appeared first on Caroline Høgh Groth.
]]>The post Vegan Banana Bread appeared first on Caroline Høgh Groth.
]]>I’ve come up with a recipe so you can enjoy your banana bread with a good and clean conscience knowing you are actually eating something that will be beneficial to your body. Plus side is, it tastes freaking amazing too :)
The banana bread is vegan, sugar-free, gluten-free, dairy-free, egg-free, soy-free. There are nuts in there so be careful if you have any nut allergies.
Enjoy!
Ingredients:
- 1 cup gluten-free oat flour
- 1 cup almond flour
- 1 tsp gluten-free baking powder
- 1 tsp cinnamon
- 1/4 tsp nutmeg
- Pinch of rock salt
- 2 tsp pure vanilla bean paste
- 1/2 cup Almond Breeze Unsweetened Vanilla Almond Milk
- 1 & 1/2 tsp rice malt syrup
- 2 large bananas (mashed)
- 1 medium banana, halved.
- 1 handful raw almonds + 8 raw almonds, chopped, for topping
Directions:
- Heat the oven to 190 degrees (fan-forced).
- Mix oat flour, almond flour, baking powder, cinnamon, nutmeg & salt in a bowl.
- In another bowl mash the two large bananas, add the vanilla bean paste, rice malt syrup and mix well. Add to the dry ingredients and mix with almond milk too. Stir with a spoon until everything is well mixed.
- Chop a handful of raw almonds and combine with the dough.
- Pour the dough into a loaf pan and top with the halved banana and extra chopped almonds.
- Bake in the oven for about 30-40 minutes. Stick a skewer through to see when the banana-bread is done and still slightly moist inside.
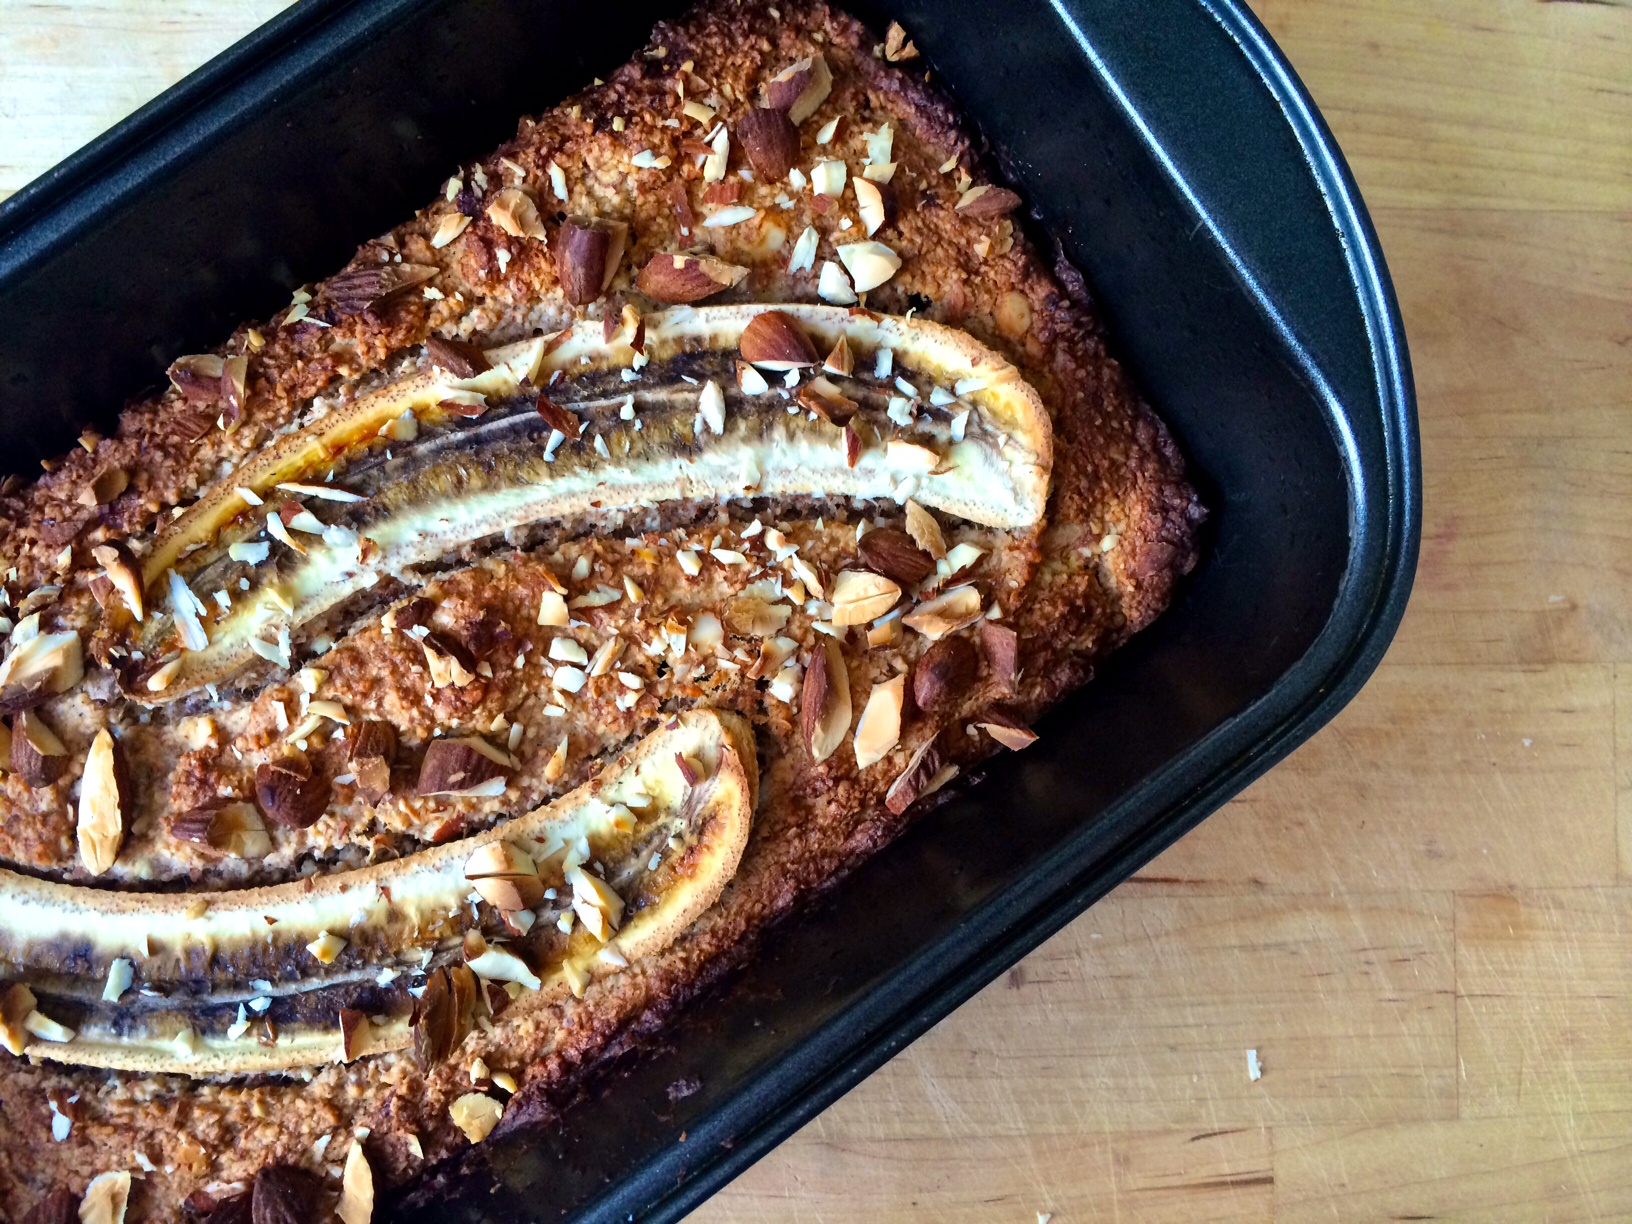
Finished banana bread.
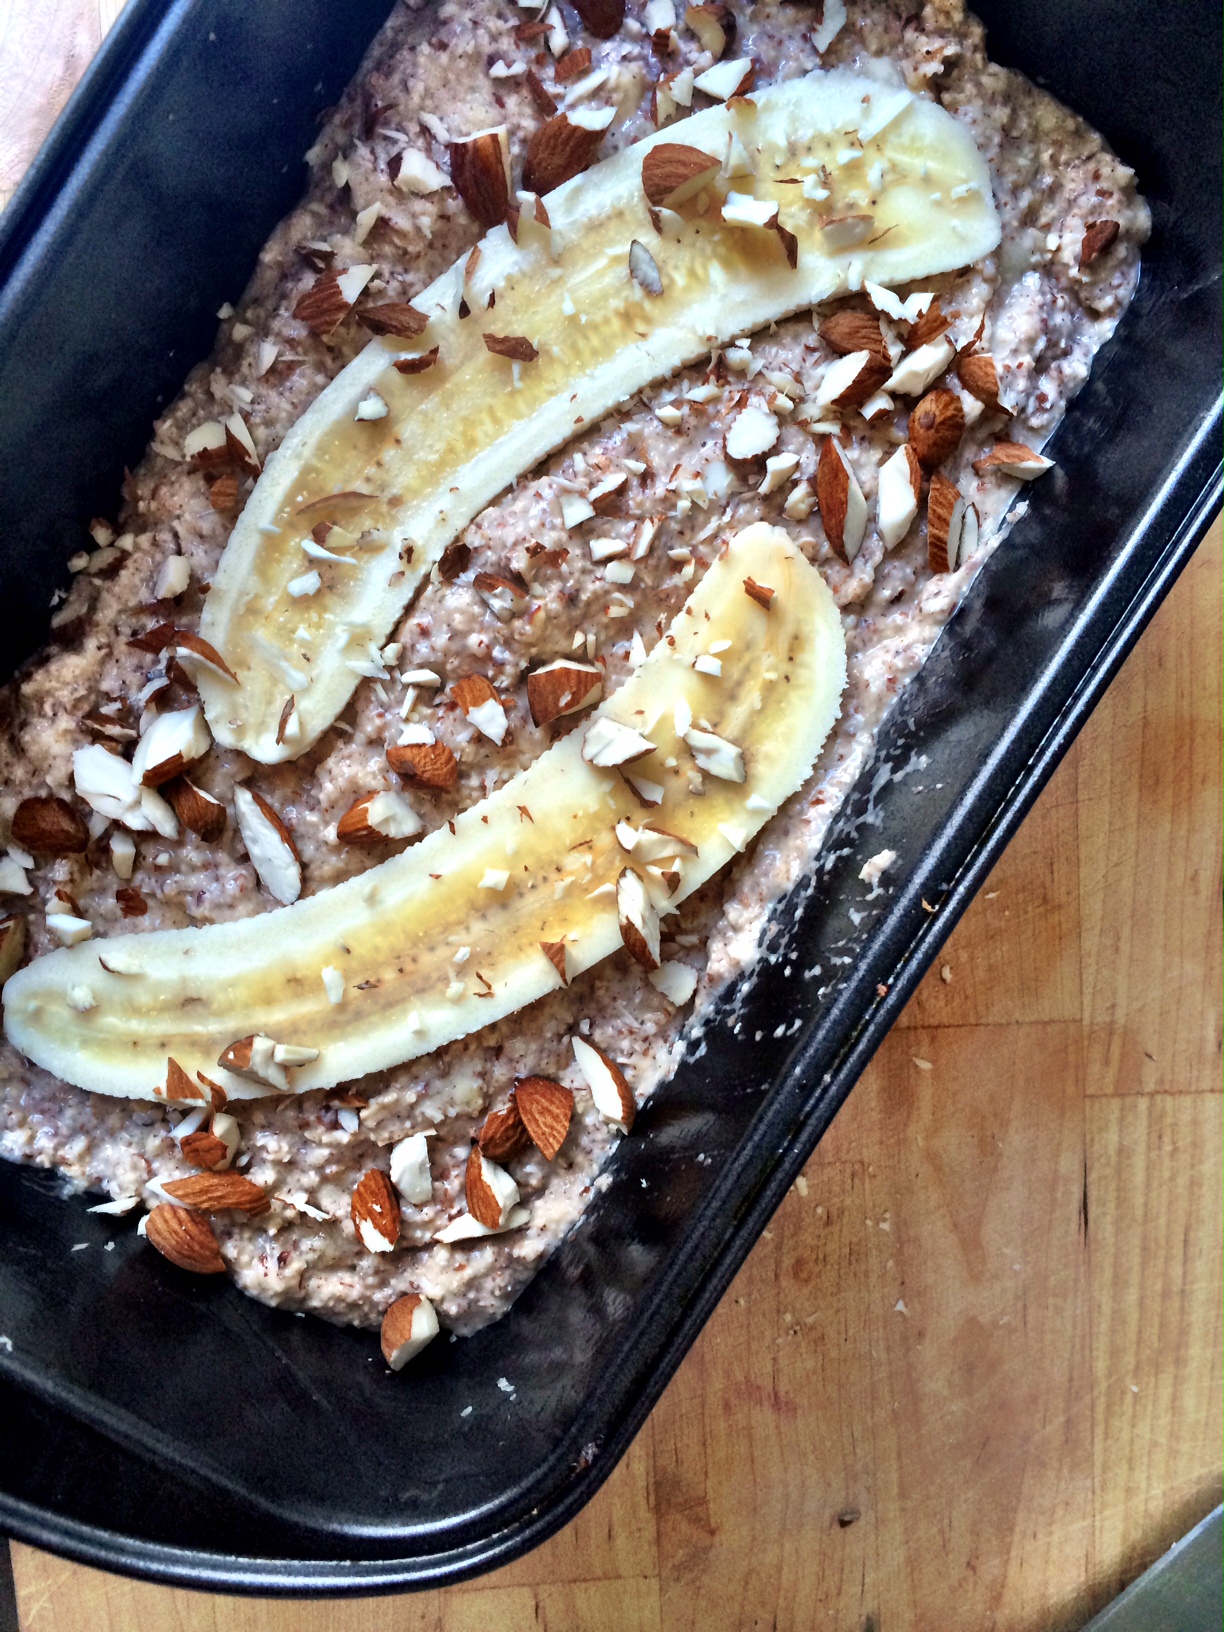
Before it goes in the oven.
The post Vegan Banana Bread appeared first on Caroline Høgh Groth.
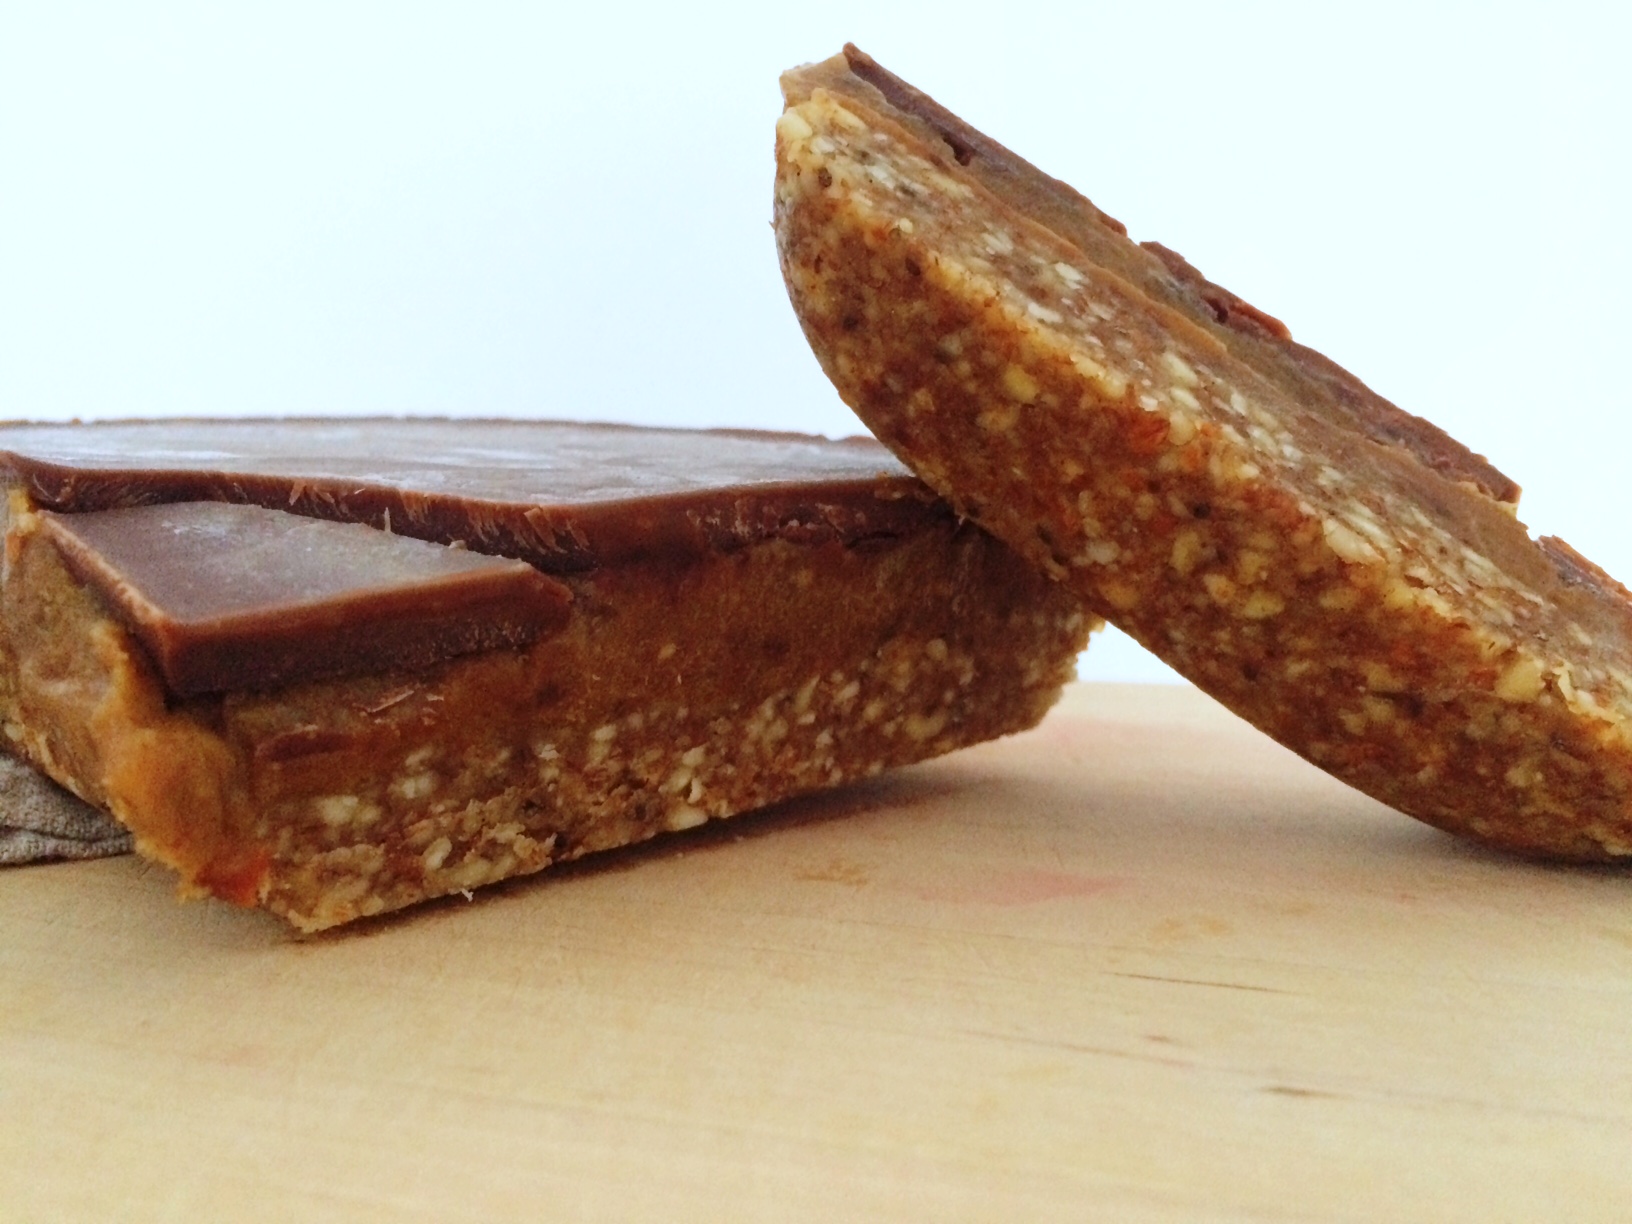
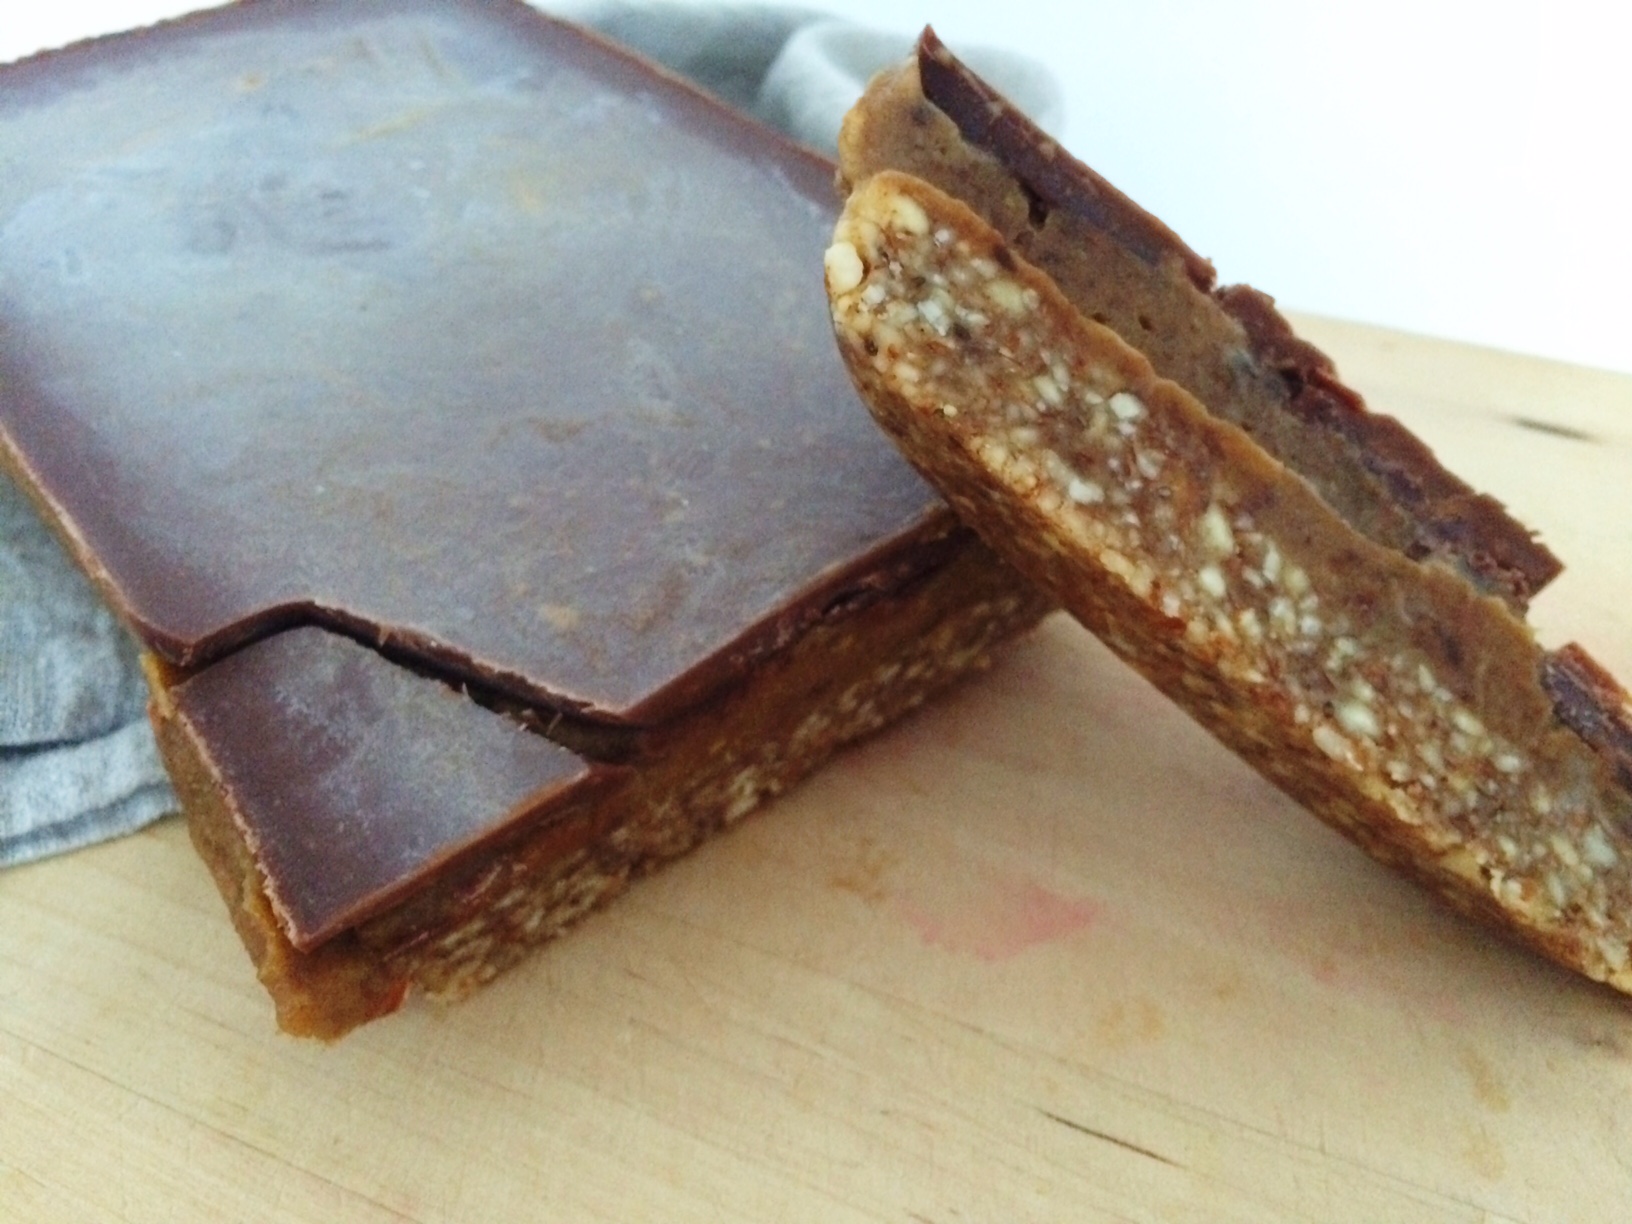
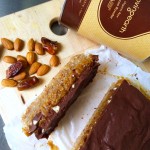
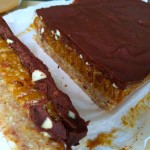
]]>The post Coconut & Almond Crunch Caramel Slice appeared first on Caroline Høgh Groth.
]]>It resembles a caramel slice, but with a twist of coconut in the caramel and with crunchy almonds in the middle layer.
You get the delicious soft bottom layer, a sweet, smooth middle caramel layer, crunchy nuts and the bitterness from the dark raw chocolate on the top.
It only takes about 20 minutes to make and 2 hours to set in the freezer – and best of all? You don’t need any heating so you keep all the nutritional values!
Ingredients:
Bottom Layer:
- 1/4 cup raw macadamias
- 1 cup raw almonds
- 4 tsp organic virgin coconut oil
- 1 tsp vanilla bean paste
- 1/4 tsp rock salt
- 5 tbsp Almond Breeze Unsweetened Vanilla Almond Milk
Caramel Layer:
- 2 cups dates, pitted, soaked.
- 2 small handfuls of shredded unsweetened coconut
- 1/4 cup Almond Breeze Unsweetened Almond Milk
- 1 tsp Vanilla Bean Paste
- 1 tbsp Organic Virgin Coconut Oil
- 1 handful chopped raw almonds
Chocolate Layer:
- 1/4 cup organic virgin coconut oil
- 6 dates, pitted, soaked, chopped
- 4 heaped tsp Loving Earth Raw Cacao.
- Dash of salt
- 2 tbsp Almond Breeze Unsweetened Almond Milk
- 1 tsp Organic Brown Rice Malt Syrup
Directions:
- For the Bottom Layer: Combine almonds, macadamias, coconut oil, salt, vanilla bean & almond milk in a blender and blend until well-grounded and you can press the ‘dough’ together with your hands. Take a loaf pan and spoon the dough into this, pressing it firmly down with a spoon. Place in freezer.
- For the Caramel Layer: Combine dates, shredded coconut, vanilla bean, coconut oil & almond milk in a blender and blend until completely smooth, scraping down the sides as you go along. Take your bottom layer from the freezer, and spoon the caramel on top of this in the loaf pan. Sprinkle with chopped almonds and place back in freezer.
- For the Chocolate Layer: Combine coconut oil, dates, raw cacao, salt, almond milk and rice malt syrup in a blender and blend until smooth. Take your loaf pan with the rest of the layers and spoon the chocolate on top of this, smoothing it out. Place back in freezer and let it set for 2 hours. Keep it stored in the freezer until you need a piece


The post Coconut & Almond Crunch Caramel Slice appeared first on Caroline Høgh Groth.
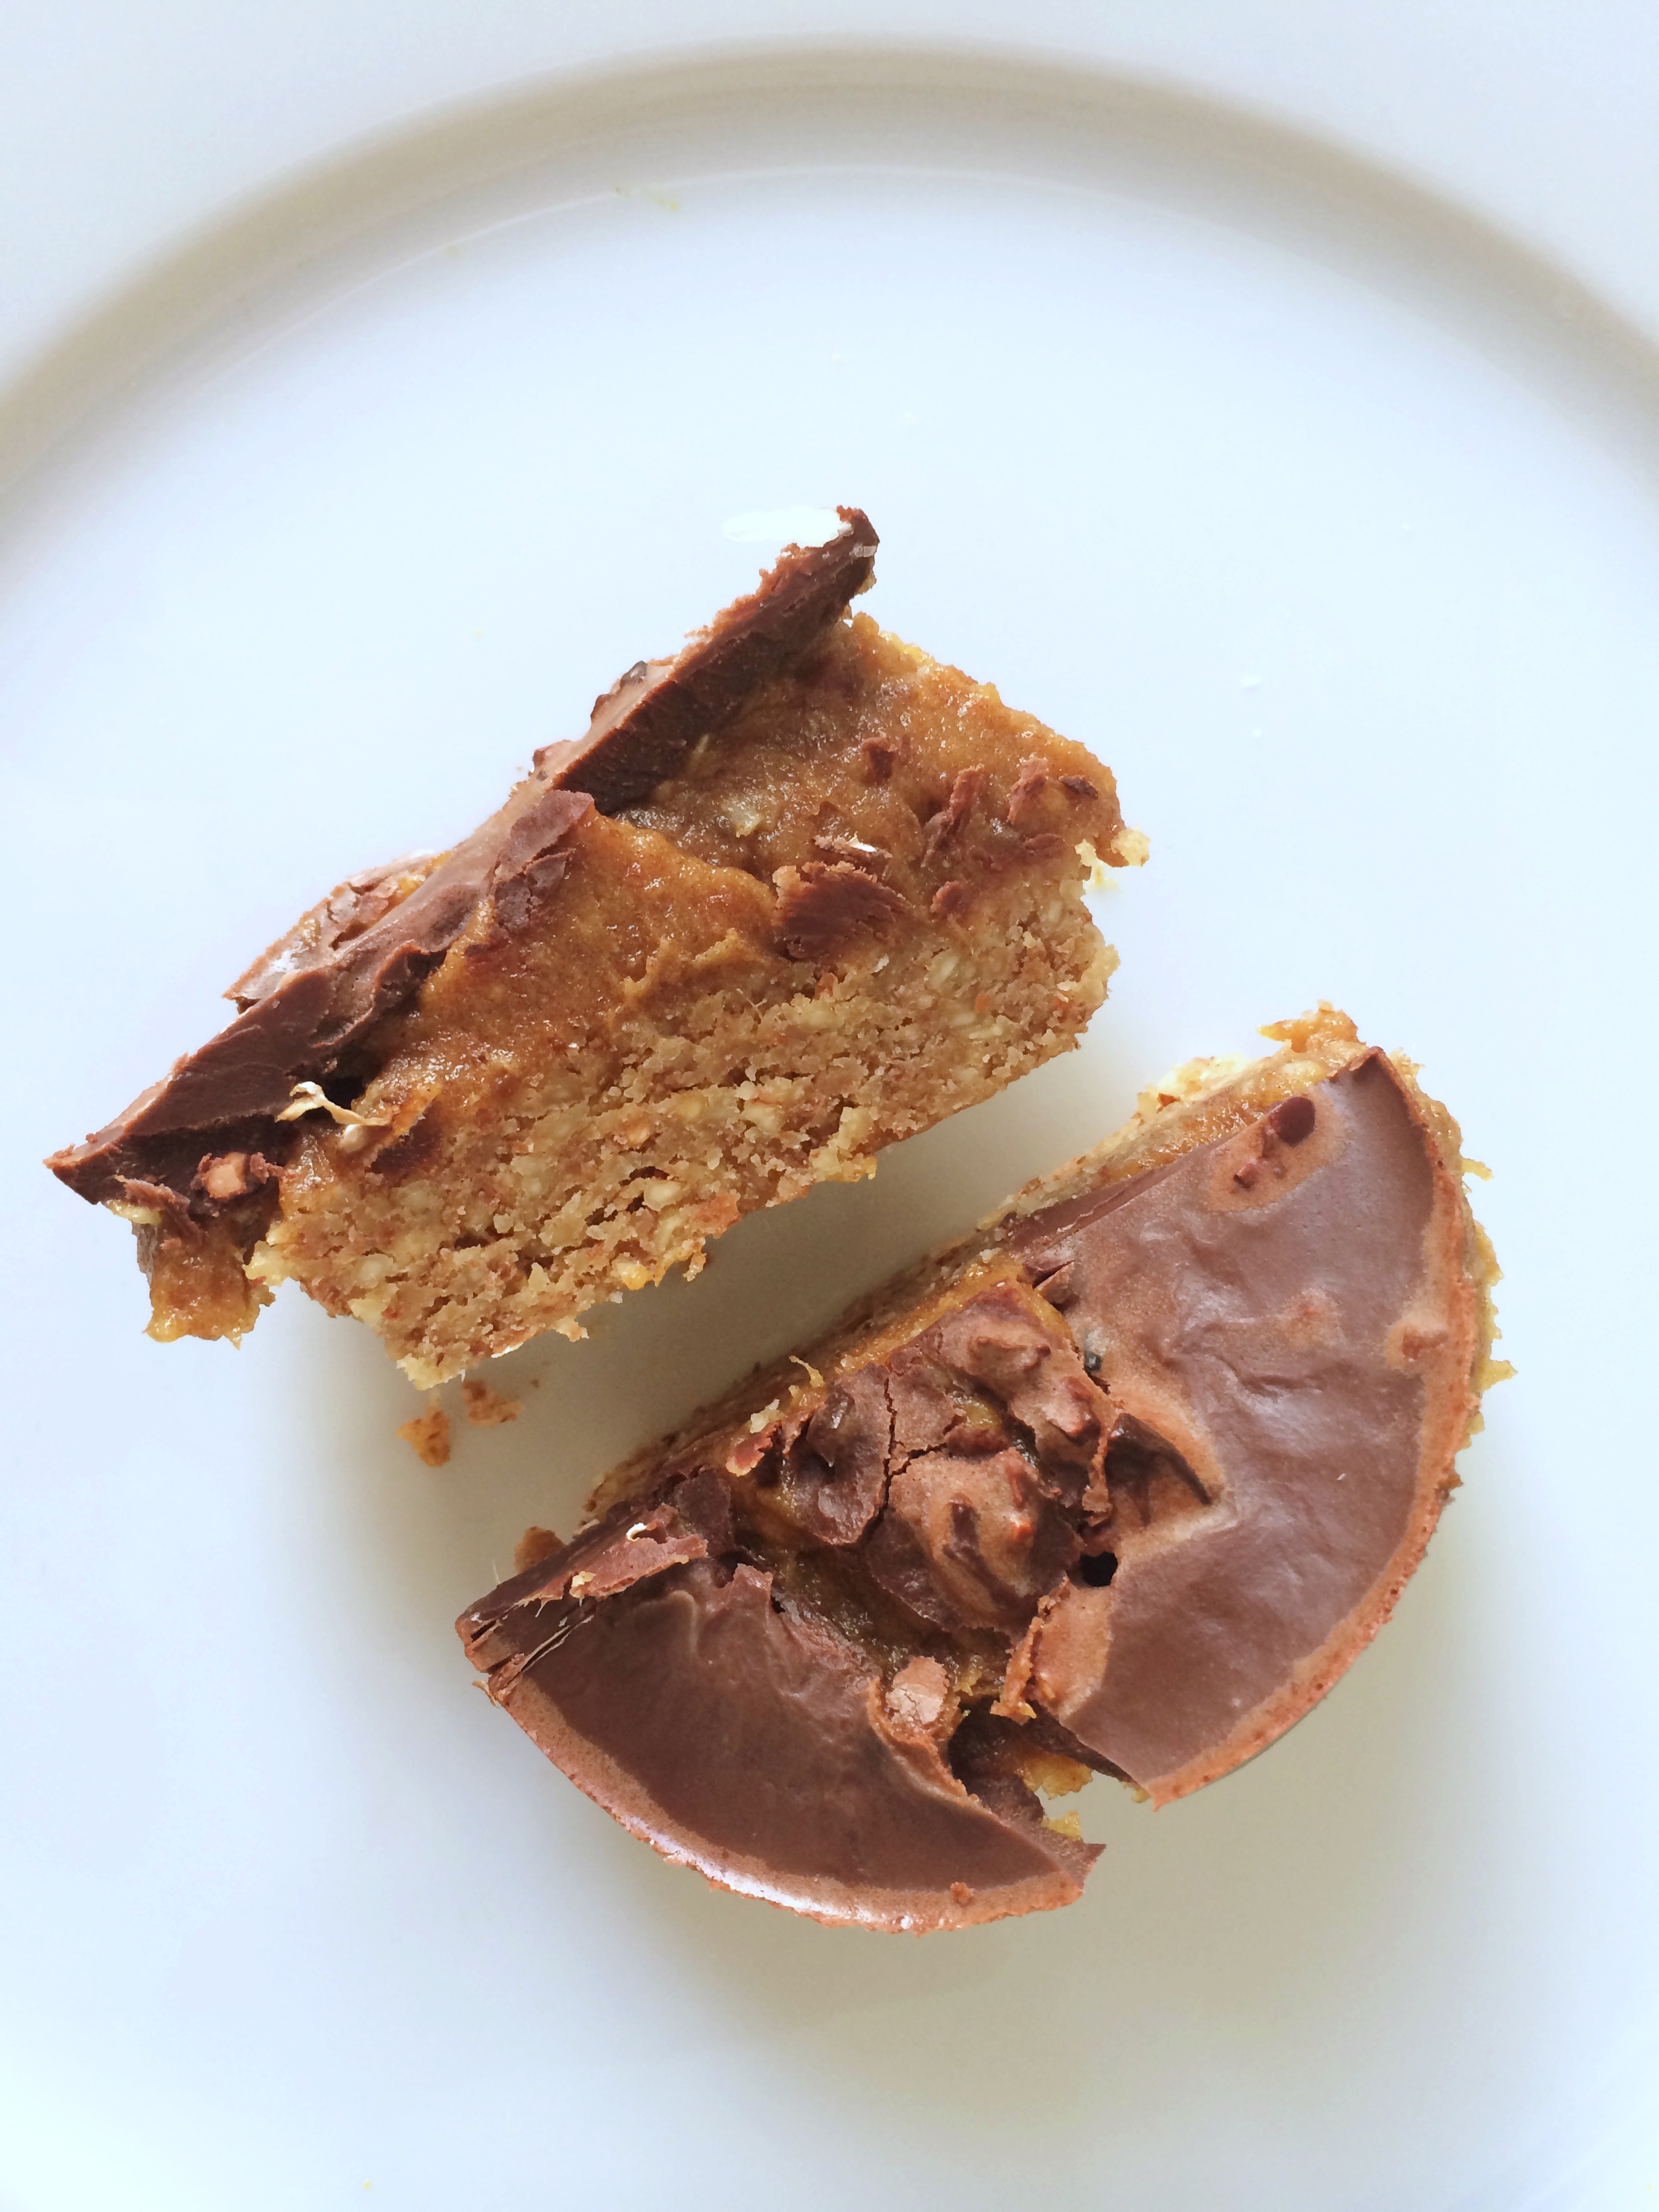
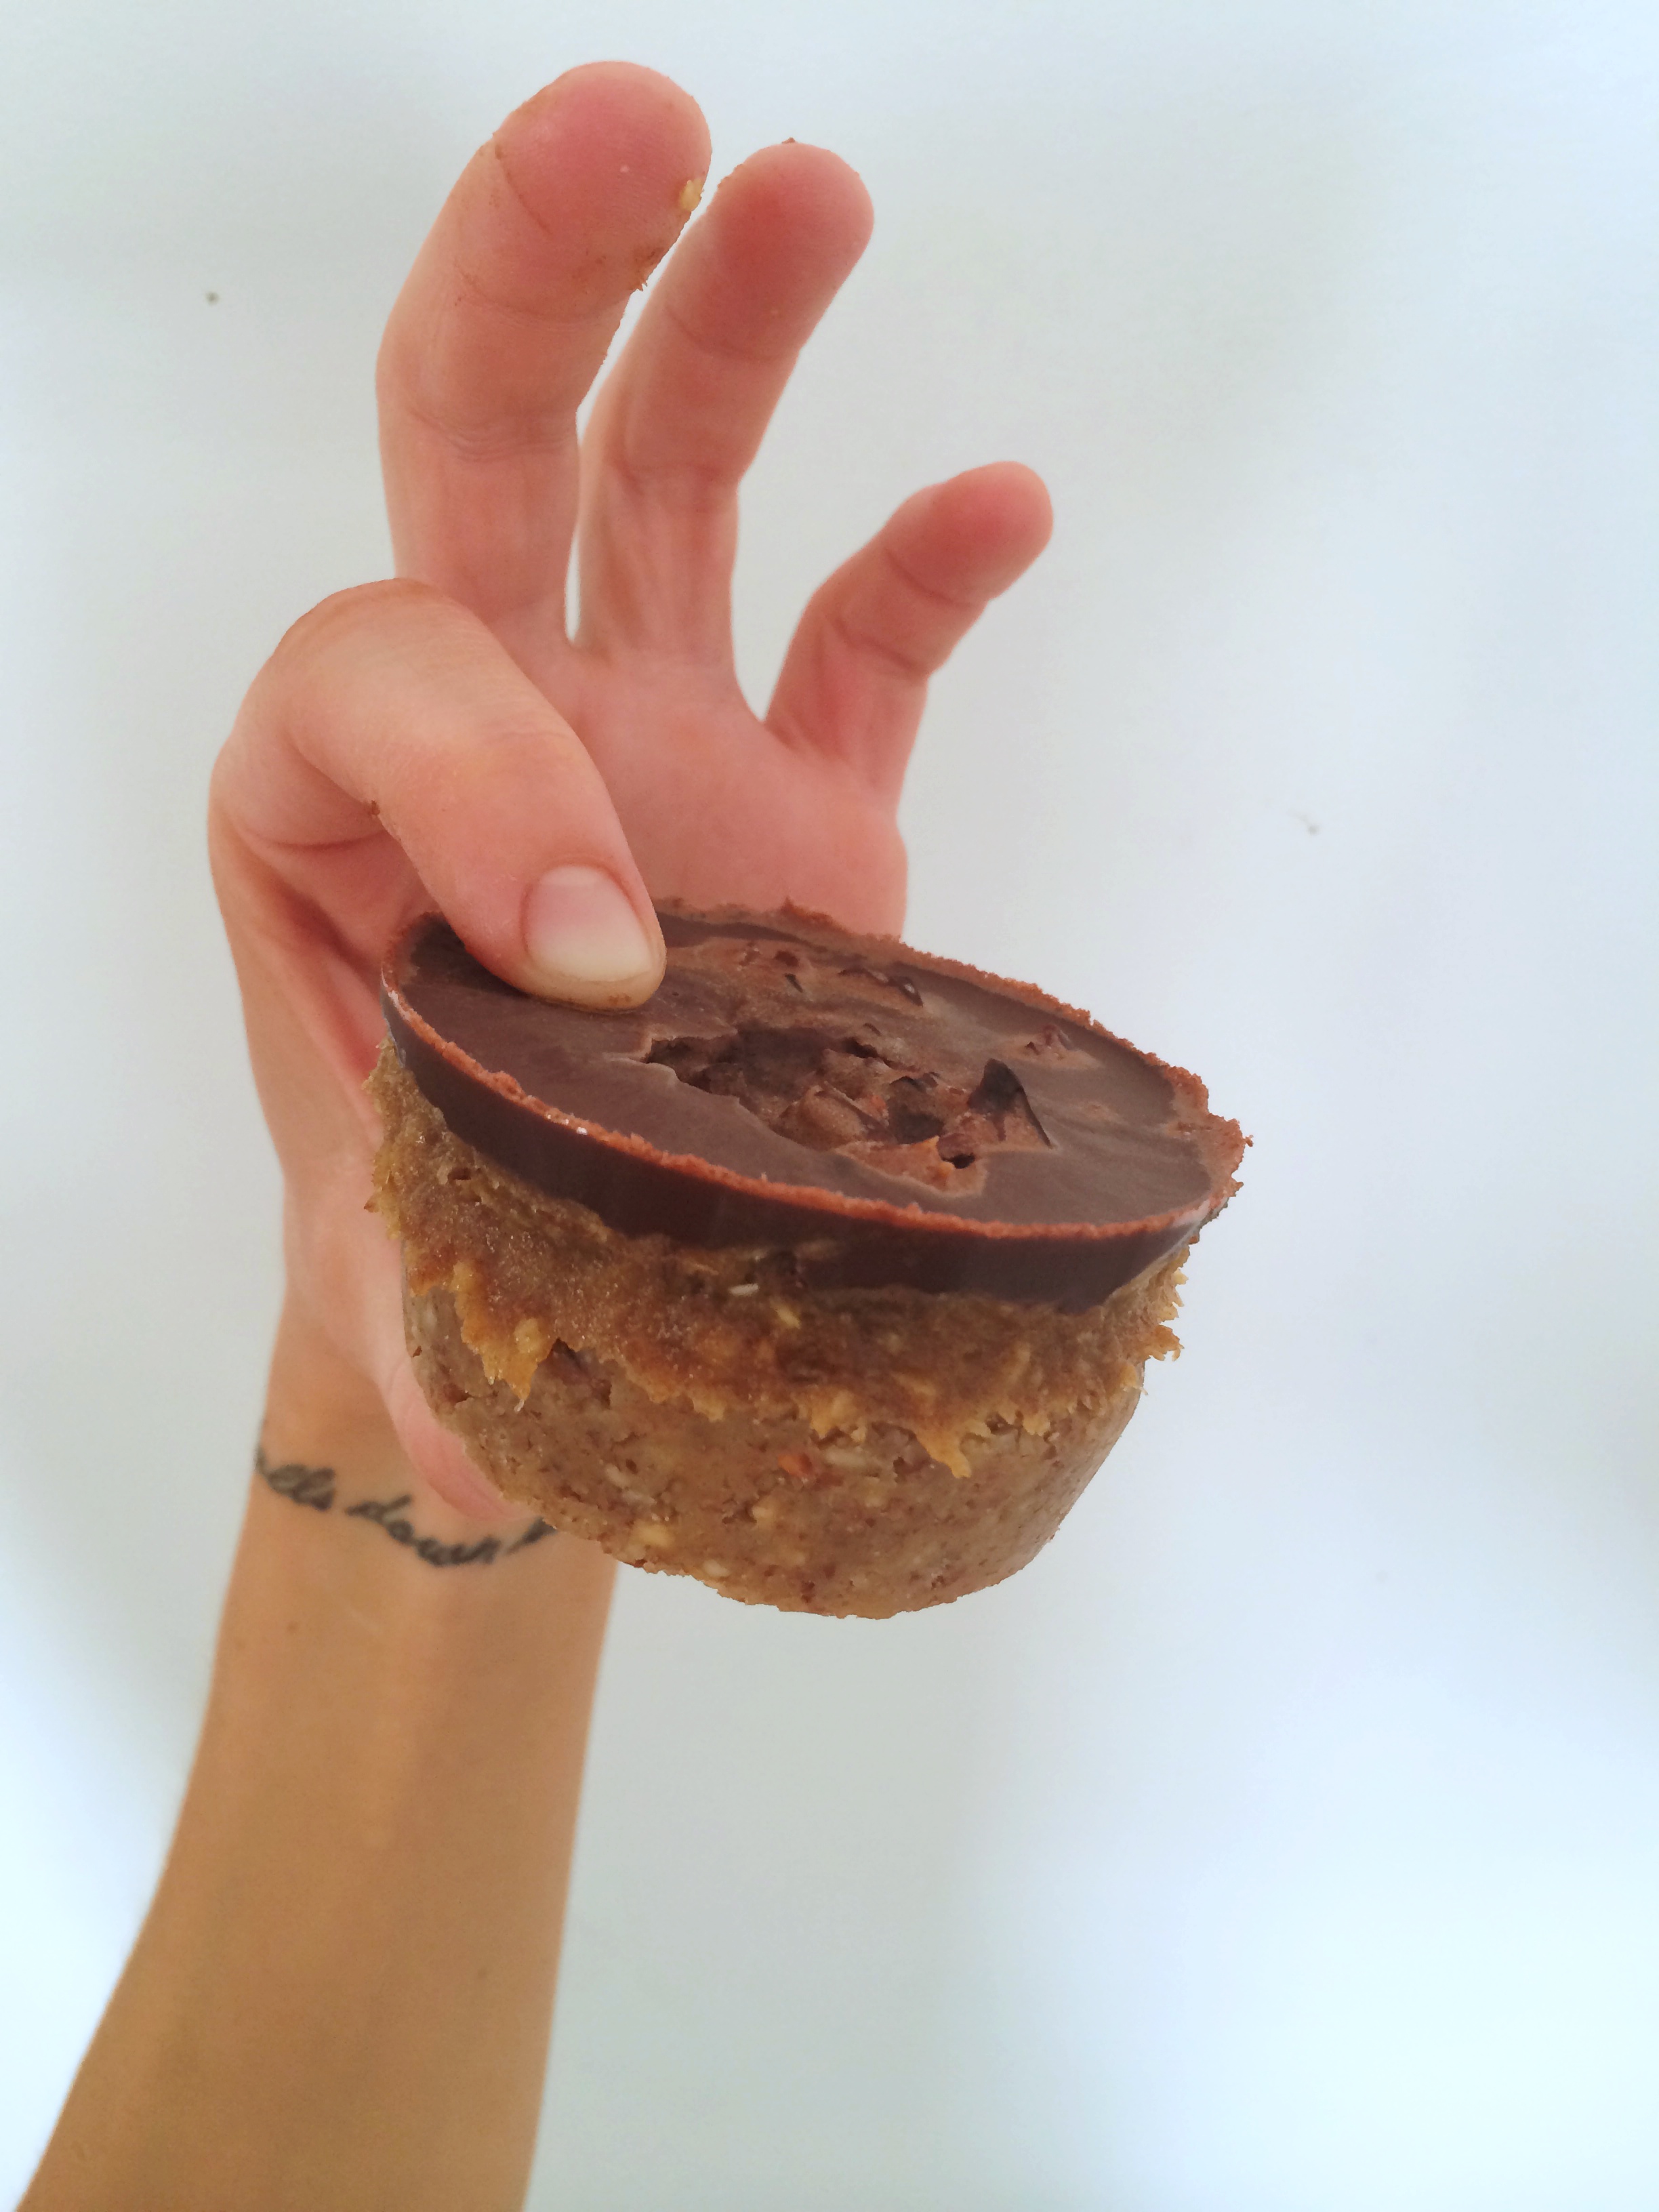
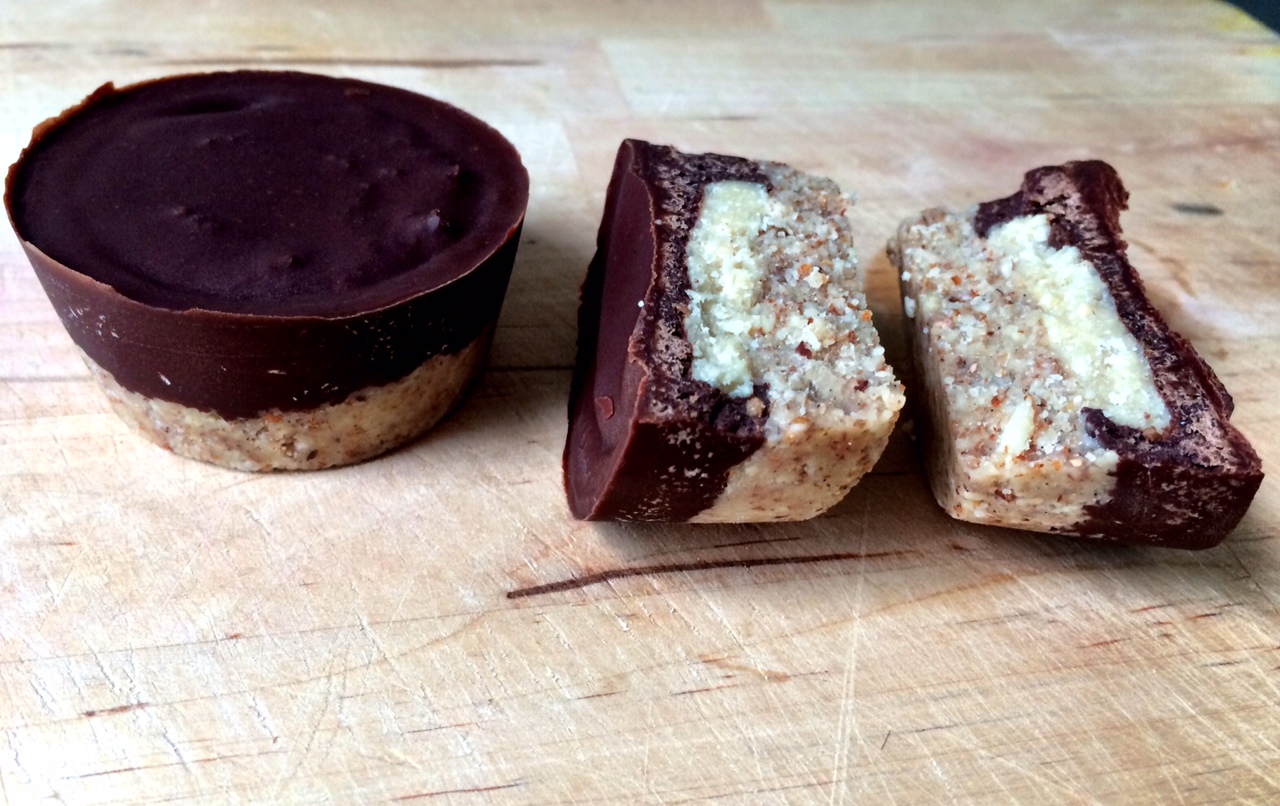
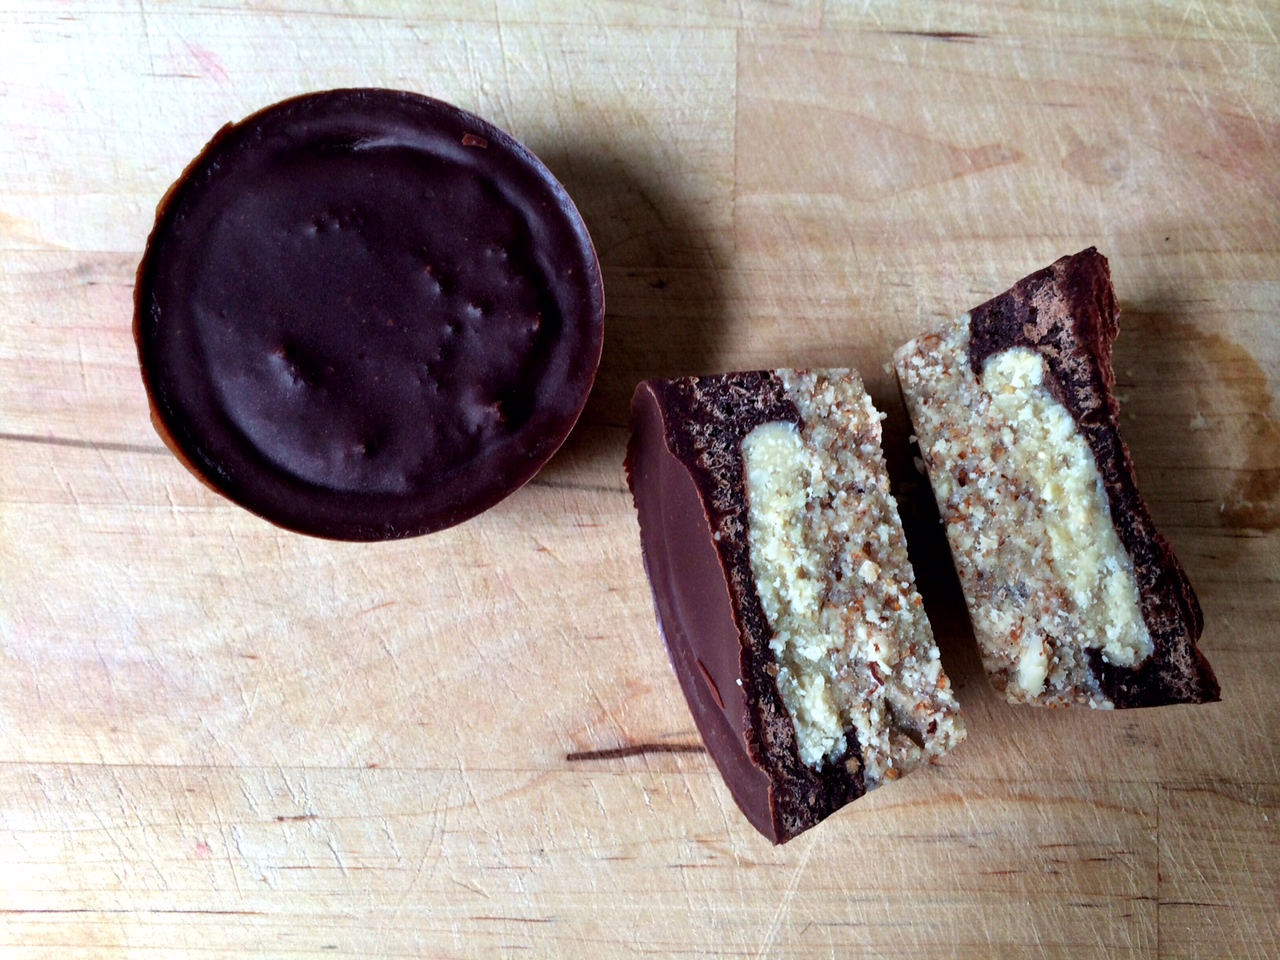
]]>The post Raw Peanut & Coconut Butter Cups appeared first on Caroline Høgh Groth.
]]>These are super quick to make and you only need a few stable ingredients that you no doubt will have in your cupboard if you’re a rawtarian or vegan. They set quickly too, meaning you can make these before cooking dinner and have one after dinner is over.
Deliciously nutty and coconutty, you’ll love this delicious, healthy treat – I PROMISE!
Ingredients:
Almond Base layer:
- 1 cup almonds
- 6 tbsp organic virgin coconut oil
- 1 & 1/2 tsp vanilla bean paste
- 1 tsp rice malt syrup
- Pinch of rock salt
Peanut & Coconut Butter layer:
- 1/3 cup raw peanuts (unsalted)
- 1 tsp rice malt syrup
- 1/2 tsp rock salt
- 6-8 tbsp organic virgin coconut oil
- 1 tsp desiccated coconut
Chocolate layer:
- 1/4 cup organic virgin coconut oil
- 4 tbsp raw cacao powder
- 1/2 tbsp rice malt syrup
- 1/2 tsp vanilla bean paste
- 8 medjool dates
- Pinch of rock salt
Directions:
- To make the Almond Base Layer: Combine almonds, coconut oil, vanilla bean, salt & rice malt syrup and blend until you can make a dough that’ll easily stick together when you handle it with the hands. If too dry, add a tiny bit more coconut oil.
Take a muffin-form with place for 6 and add the dough, pressing down firmly. Let it sit in the freezer. - To make the Peanut & Coconut Layer: Combine peanuts, rice malt syrup, salt, coconut oil and desiccated coconut to a blender and keep blending for 4-5 minutes, scraping down the sides until a paste This peanut butter will have a thicker consistency. Add more coconut oil to make it more runny if you wish.
Grab your almond-base layer from the freezer and roll a small ball out of the peanut butter, adding one to each cup of the muffin-form and pressing them down on top of the almond-layer slightly so they squeeze out to a flat ‘pancake’. - To make the Chocolate Later: Combine coconut oil, raw cacao powder, rice malt syrup, vanilla bean, dates and salt in a blender and blend until completely smooth.
Take your muffin-form and spoon over the chocolate on each cup. Put them back in the freezer and let them set for 30 min – 1 hour.
The post Raw Peanut & Coconut Butter Cups appeared first on Caroline Høgh Groth.
]]>