The post The Crispiest & Gut Friendly Brussels Sprouts You’ll Ever Taste – Ready in 15! appeared first on Caroline Høgh Groth.
]]>I’m here to change your perception and judgment of the humble brussels sprouts and if you’re already a brussels lover? Well, then I might even make you fall even harder and deeper in love with them with this recipe.
I’ve got to let you in on the secret to getting crispy brussels sprouts in a matter of minutes though – it’s all thanks to the new Ninja Foodi which is literally a comprehensive ‘kitchen-system’ that includes the multiple cooking functions like; grilling, steaming, baking, roasting, pressure cooking, air frying and slow cooking up to 70% faster than traditional methods, without losing the integrity of your favourite flavour-filled dishes.
And although Ninja did contact me to try this new compact kitchen machine out, initially I was sceptic, but I can genuinely say I’ve fallen head over heels with the ease, efficacy and taste that this machine brings to my meals. I’m especially looking forward to using it for winter to cook soups, casseroles and stews that are hearty and warm – especially gut-friendly ones, as cooked vegetables and cooked meats are a must if you’re dealing with a poor digestion (raw food is simply too hard on it) – to come home to after a long day out.
The smart thing about the Ninja Foodi is that it has several functions as described above. But, the other really clever things is that you can cook a whole meal in one go. This is a super smart thing for anyone who doesn’t have extensive time to spend in the kitchen or maybe just don’t want to? It truly does seal in the flavour and moisture like nothing else, and the salmon fillet I cooked with this recipe (below) is one of the most moist fillets I’ve ever tasted.
The one thing I’ve also come to discover is this; the manual is a little overwhelming in the beginning because there are so many different functions and uses to this machine (hence why it’s so comprehensive), but once you actually just start playing around with it, you’ll quickly realise it’s really darn hard to mess it up, even if you try to be really ‘fancy’ and make an inventive meal, it just somehow works. Even Pash can figure out how to operate it and cook when I’m not home to ‘put the bacon on the table’, and it takes only a few minutes to clean with soap & warm water.
I wanted to showcase a recipe that’s in season, because I believe it’s so important to eat what’s seasonally fresh and available to us – both for our bodies but also for the environment around us as it has far less impact on it that way.
In Australia, its’ Brussels Sprouts season currently and they’re super duper cheap – I’m talking a kilo for $5-$7. The same goes for broccoli and then simply adding a (skin off) fillet of salmon to the pot and you have yourself a healthy, gut-friendly and easy meal that can be prepared by anyone.

Ingredients:
- 1 piece of skin-off salmon fillet
- 150 grams of brussels sprouts (stems removed, halved)
- 4 florets of broccoli
- 1/4 avocado
- 1 tsp toasted sesame oil
- 1 tsp flaxseed oil
- 2 cups of water
- 1/2 lemon
- Hemp Seeds
- Pepitas
Directions:
- Pre-heat your Ninja Foodi on air-crisping mode for 2-3 minutes.
- Add the brussels sprouts to a bowl and lightly coat in a little toasted sesame oil & salt and pepper.
- Add them to the AIR FRYING basket, and set the Air Crisper Setting to 15 minutes.
- After 7 minutes, toss the brussels sprouts in the air frying basket, and create a little ‘hole’ in the middle.
- Add the salmon fillet (with salt & pepper) in between the brussels sprouts and keep air-crisping for another 7-8 minutes.
- Add 2 cups of water to the POT and add the AIR-FRYING basket.
- Add your broccoli & put on the steaming-lid. Keep the vent open.
- Hit steam & leave it for about 5 minutes so it’s lightly steamed, but still with a slight crunch to the bite.
- Arrange all on a plate, and add avocado, 1/2 lemon, hemp seeds & pepitas, drizzle with flaxseed oil.
With Mother’s Day Coming Up, This Is The PERFECT Gift.
Use The Discount Code
GROTHFOODI
to receive $60 off RRP + Free Delivery x
CLICK HERE
The post The Crispiest & Gut Friendly Brussels Sprouts You’ll Ever Taste – Ready in 15! appeared first on Caroline Høgh Groth.
]]>The post One Pan Vegetable Wonder appeared first on Caroline Høgh Groth.
]]>You really cannot go wrong with this dish. Even if you’re not a cook, it’s very hard to mess up. It’s also easy, convenient and quick – all the key-words you want, especially if you’re time-poor, a mumma or just don’t like cooking but still want to eat healthy?
This dish contains loads of delicious green vegetables and I’ll tell you why: Green Leafy Vegetables health benefits includes improving digestive health, maintaining weak eyesight, balancing cholesterol levels, enhancing youthful skin, treating anemia, fighting free radicals, supporting cardiovascular health, promoting weight loss, boosting energy levels, and increasing lifespan. Just to name a few..
One Pan Wonder – serves 2 people (DF, GF, SF, V)
Ingredients:
- 1/2 medium Zucchini, halved, sliced
- 1/4 head of Broccoli, cut into florets
- 1/8 head of Purple Cabbage, cut into slices
- 1/4 Leek, halved, sliced
- 2 Radishes, halved, sliced
- 2 pieces of Silverbeet, sliced
- 2 pieces of Kale, sliced
- 1/2 handful of Parsley
- 1/2 handful of Basil
- Salt & Pepper
- 1/2 tsp Turmeric
- 1/2 tsp Smoked Paprika
- 1/2 tsp Cumin
- 1/2 tsp Fennel Seeds
- 2 tbsp Bone Broth Concentrate + 1/4 cup boiling water
- 3 tbsp Pepitas
- 2 tbsp Hemp Seeds
- Coconut Oil
- 4 Free-Range Eggs
- 1/2 Avocado
Directions:
- Chop all your vegetables and have them ready.
- Heat a large frying pan on high with some coconut oil + have a lid that fits the sauce-pan ready.
- Add all the vegetables at once, and stir-fry.
- After 4 minutes, or when the vegetables have softened & slightly browned, add all your dried herbs and fresh herbs.
- Add your Bone Broth Concentrate (which you should’ve dissolved with boiling water) to the pain. Let it simmer for 2 minutes.
- Make 4 little wells in the vegetable mixture, and crack in your 4 eggs. Turn down the heat to a medium
- Add a lid, and let it simmer for about 2 minutes. The steam will cook the eggs quickly, so keep an eye on them.
- When the eggs are done (I prefer mine soft and runny), take the pan off the heat.
- Add 1/2 avocado in the middle, sprinkle with salt & pepper, pepitas and hemp seeds.


You can find more of my recipes here x
The post One Pan Vegetable Wonder appeared first on Caroline Høgh Groth.
]]>The post Vegan Buddha Bowl appeared first on Caroline Høgh Groth.
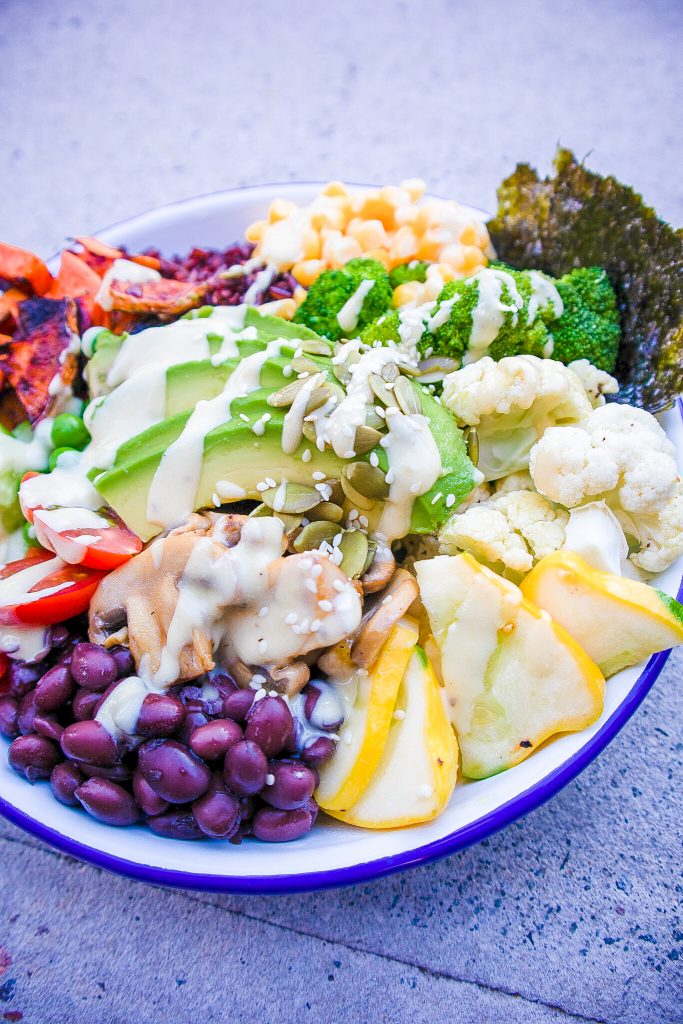
]]>I absolutely love a good buddha bowl. I think they’re super fun to create & eat, because I always feel like I get to eat the rainbow when I tuck into one and I always, always feel really good after one.
They’re so easy to adjust to the type of diet you eat, or if you have any intolerances you’re dealing with.
As you may have seen, I’ve been getting more into my vegan cooking and eating again, so expect to see many more plant-based recipes from me that will definitely also be gluten-free and always dairy-free because I’m not incorporating those into my diet any longer.
Without further a due, see below for a delicious Buddha Bowl Recipe that is vegan, gluten-free, refined grain-free, & sugar-free.
Ingredients (1 person):
- 2 tbsp fresh steamed corn
- 1/2 cup black rice
- 1/2 cup sweet potato
- 1/4 cup broccoli
- 1/4 cup cauliflower
- 1/4 cup yellow squash
- 2 tbsp black beans
- 2 tbsp cherry tomatoes
- 2 tbsp cucumber
- 1/2 avocado
- 1/4 cup mushrooms
- 1/2 nori sheet
- 1 tbsp unhulled tahini (I use Mayvers)
- 1/4 lemon
- salt & pepper
- 1 tbsp flaxseed oil (I use Melrose Health)
- 1 tbsp nutritional yeast
- water
- coconut aminos (I use Niulife)
Directions:
- Steam the corn, broccoli, cauliflower and yellow squash for a few minutes and set aside.
- Cut the cherry tomatoes in half, chop the cucumber, drain the black beans & rinse them well if using from a can, boil the black rice as per the package.
- Cut the mushrooms in 5mm slices and add to a hot pan with a bit of coconut oil. Season with salt & pepper and cook for 3 minutes or until brown. Add coconut aminos and cook for another 1 minute. Turn off heat and set aside.
- To make the Tahini dressing: mix Tahini, lemon, flaxseed oil, nutritional yeast and water in a bowl and whisk with a fork. If too thick, add more water. Taste with salt & pepper.
- Assemble everything in a bowl and drizzle with the Tahini Dressing.
ENJOY :)
And don’t forget to tag me in your creations, I’d love to see your Buddha Bowls.
Caroline xx
The post Vegan Buddha Bowl appeared first on Caroline Høgh Groth.
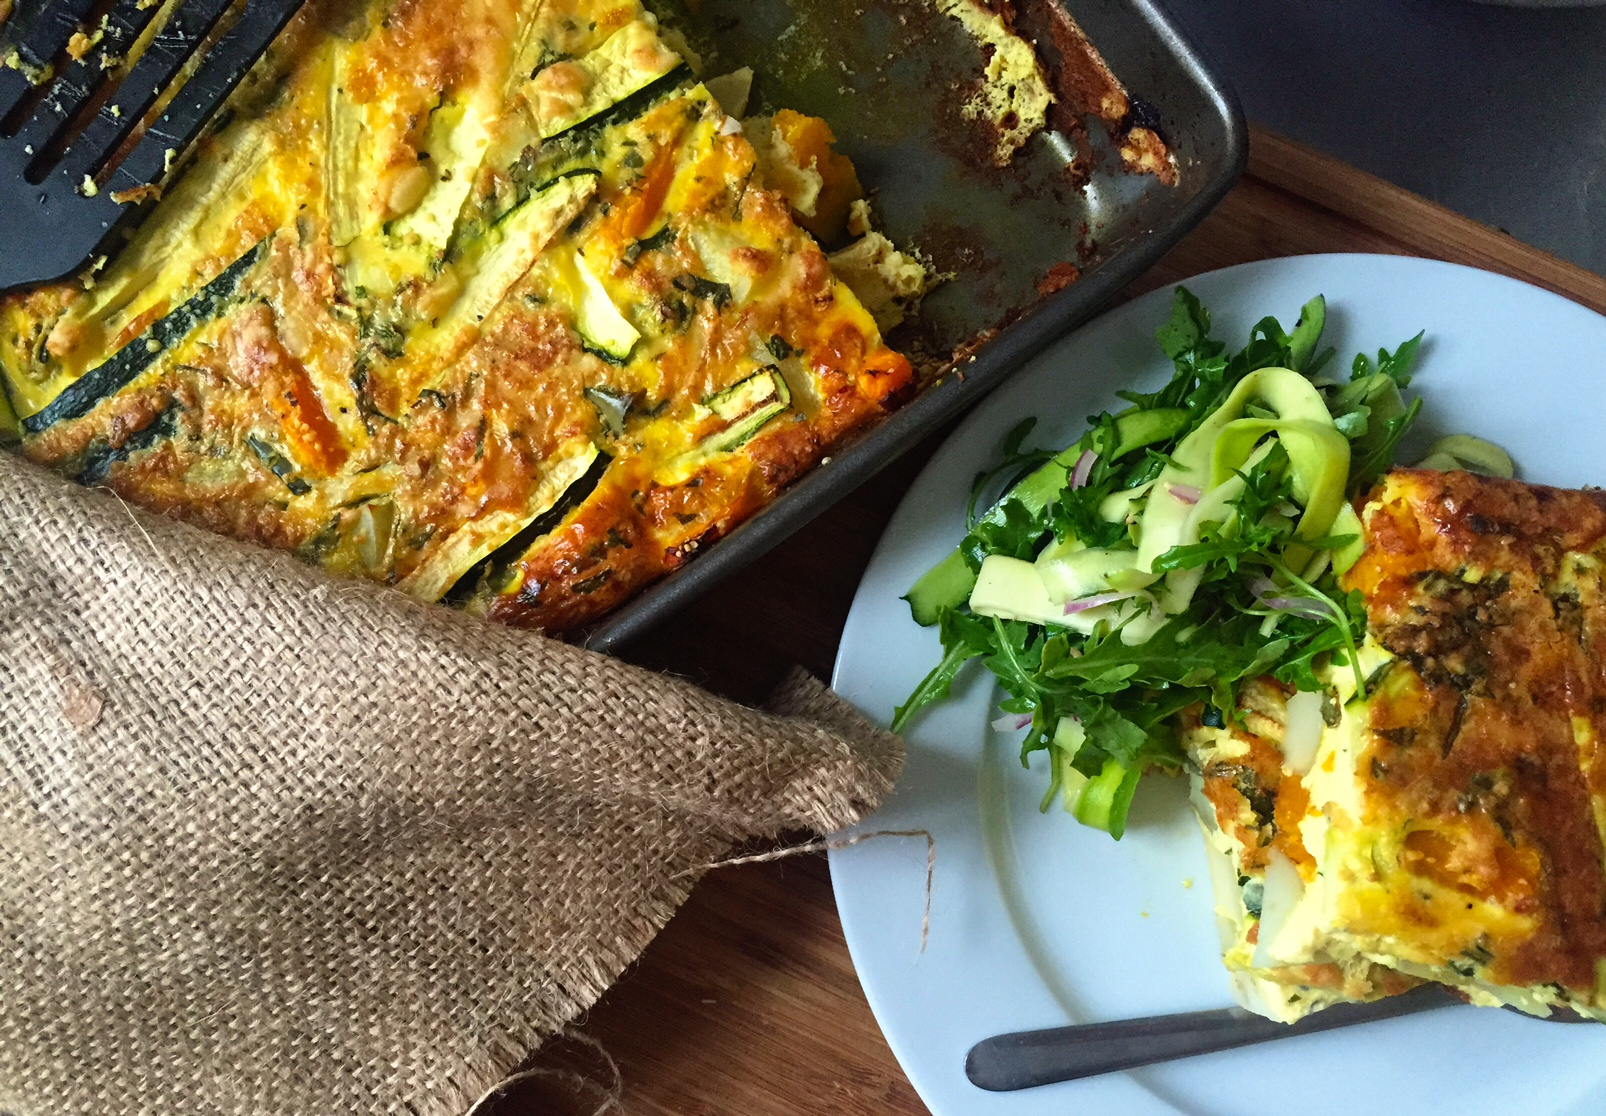
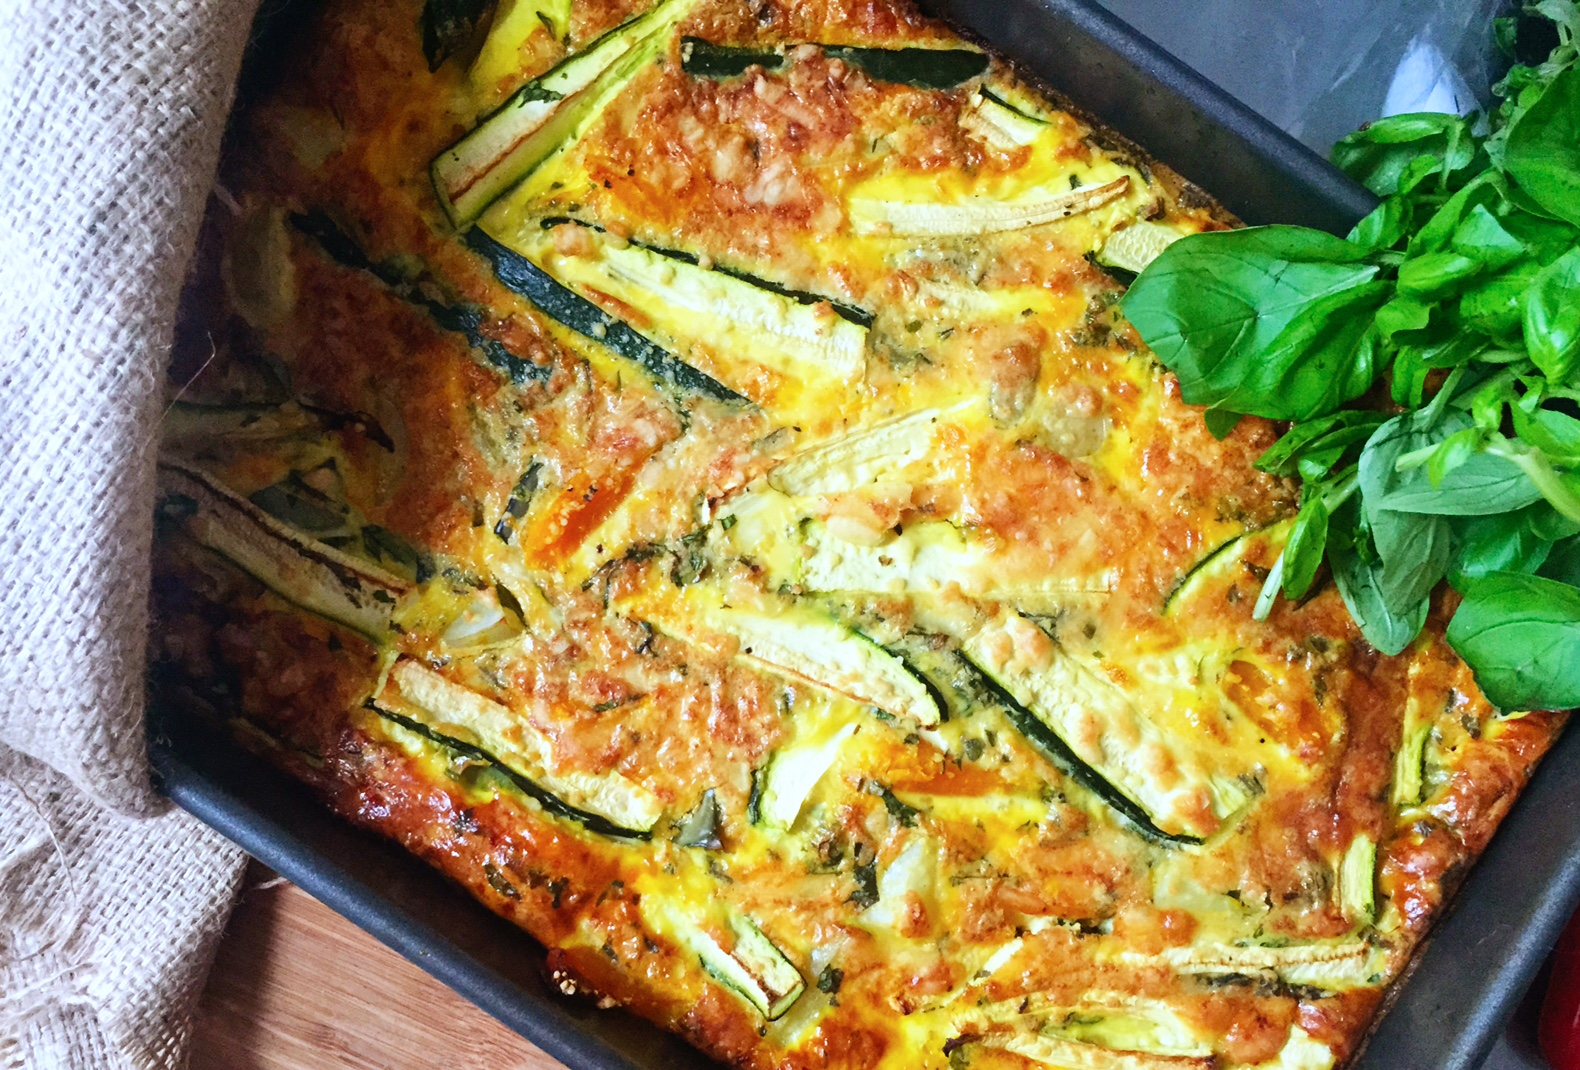
]]>The post Pumpkin, Potato & Zucchini Frittata appeared first on Caroline Høgh Groth.
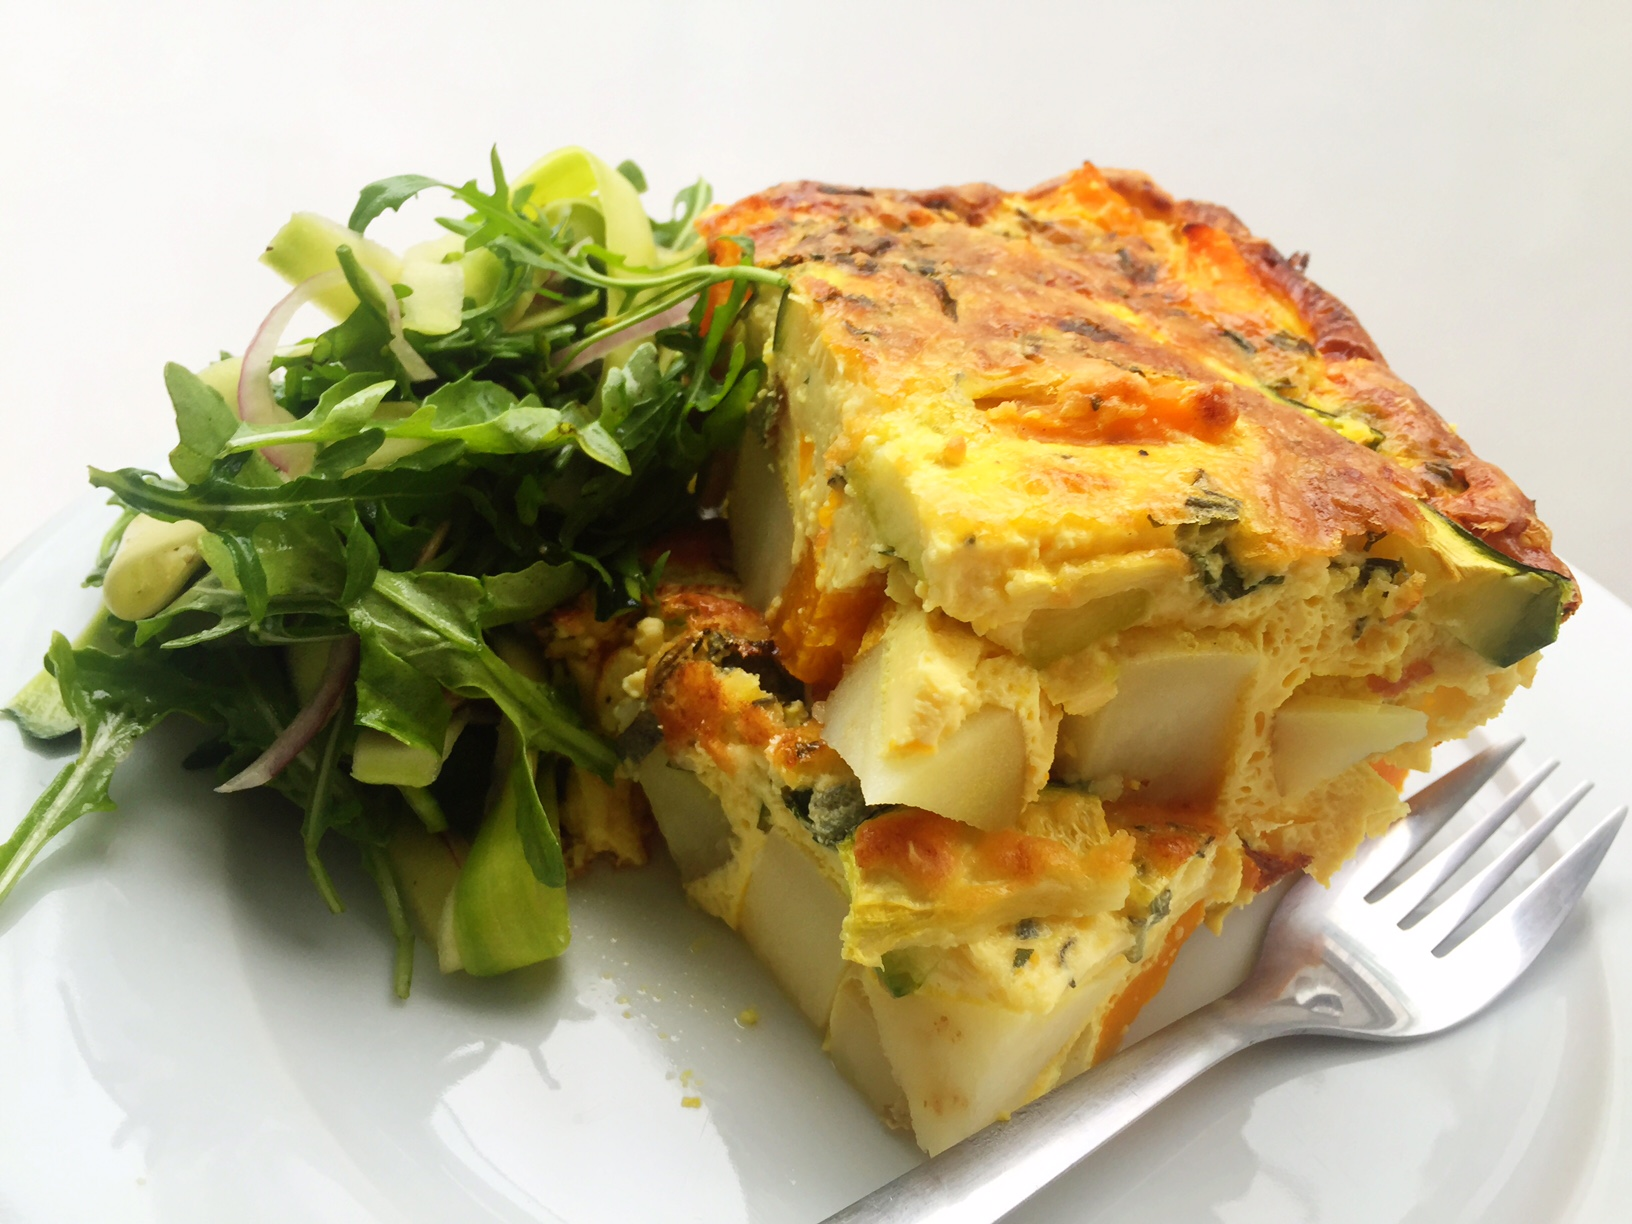
]]>However, I’m super stoked about this recipe. It’s a delicious vegetarian frittata with some gorgeous vegetable – it’s super easy to whip up and even better to pack for the kids lunch-boxes the next day. It can be enjoyed cold or warm and goes really well with a little side-salad. I had mine with a zucchini ribbon & rocket salad. Delicious!
Makes one square baking-tray:
Ingredients:
- 10 eggs
- 500 g pumpkin, skin on, in cubes (I used Jarradale)
- 300 g kestrel potatoes, in cubes
- 2 medium zucchini’s, cut length-ways in 1 cm thickness
- 1/2 cup milk of your choice (I used almond milk)
- Handful chopped fresh basil
- Few sprigs of fresh, chopped sage
- Oil to grease pan
Directions:
- Preheat your oven to 170 degrees and find your baking-pan. Grease it with oil. Set aside
- In a medium sauce-pan, bring water to the boil and cook the cubed pumpkin & potatoes until tender. App. a few minutes. Still needs a bite to it. Drain, set aside.
- Whisk all the eggs with your milk.
- Add all the pumpkin & potato to your baking-pan and layer the zucchini on top. Sprinkle the chopped basil and sage and pour egg-mix over the vegetables. Give the pan a little shake to make sure the egg-mixture is evenly spread.
- Bake the frittata for about 30-35 minutes, or until golden on top and egg-mixture is set in the middle when you poke a fork or skewer through.
- Enjoy with a little side-salad :)
The post Pumpkin, Potato & Zucchini Frittata appeared first on Caroline Høgh Groth.
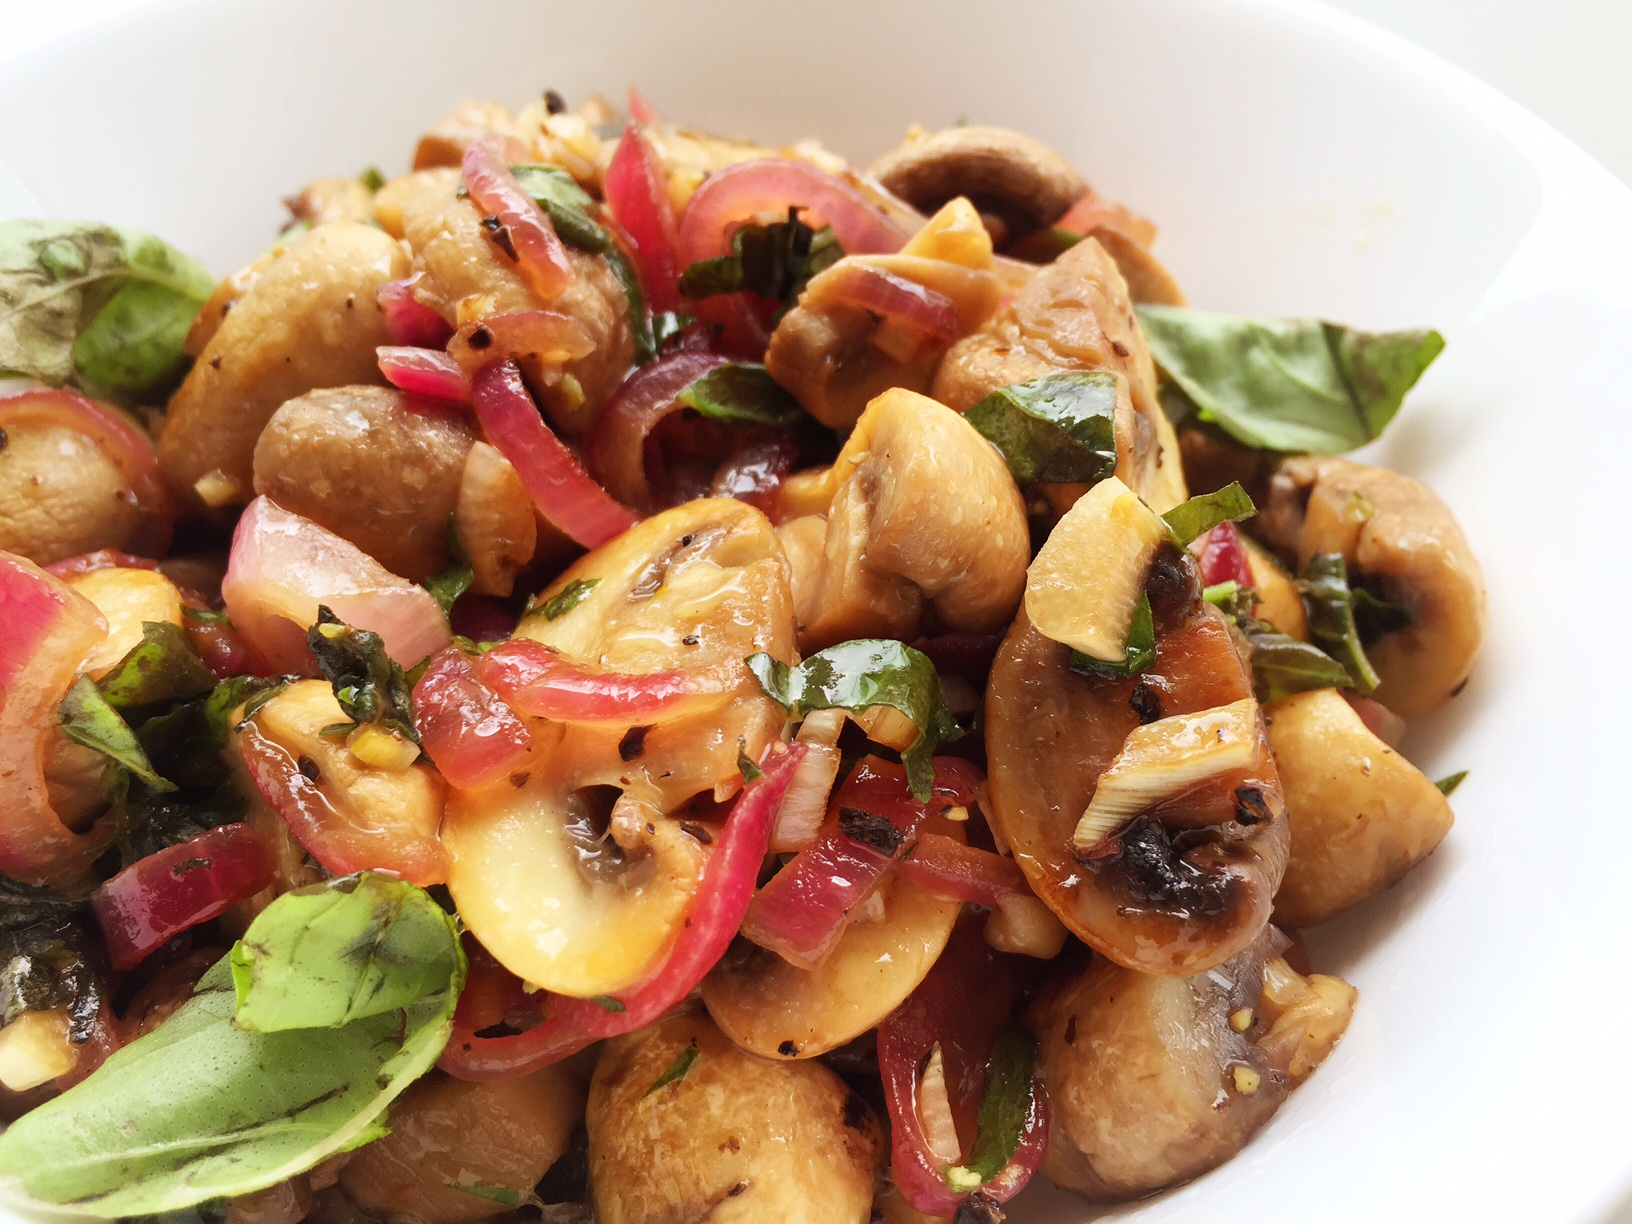
]]>The post Marinated Mushrooms (V) (DF) (GF) (NF) (SF) appeared first on Caroline Høgh Groth.
]]>These little wonders are full of Vitamin D, they will boost your immune system (goodbye flu’s!), they are full of antioxidants which help fight free radicals that are all around us and get into our bodies on a daily basis, they contain lots of Vitamin B2 & B3’s which help ramp up your metabolism, AND they are rich in the mineral selenium which studies have found can lower the risk of bladder cancer. Sounds pretty good, right?
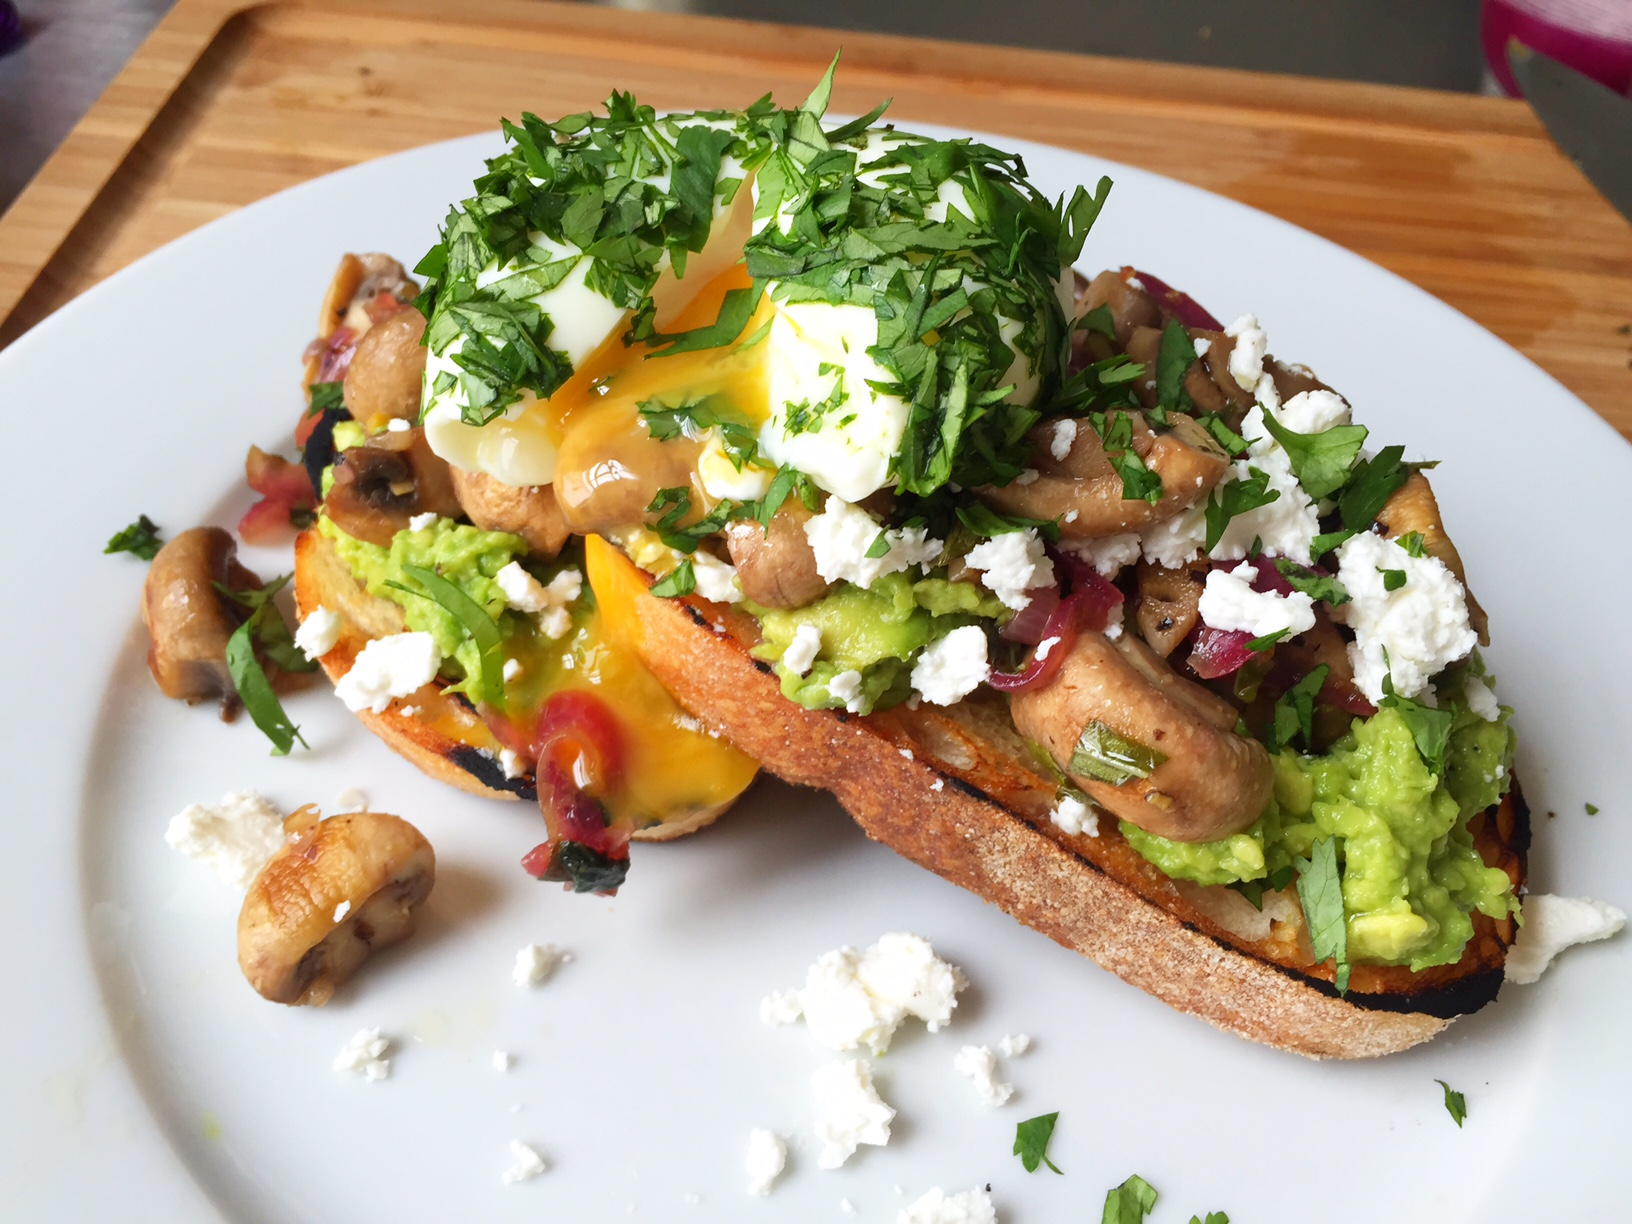
I absolute LOVE marinated mushrooms, and especially for breakfast with some good eggs on the side and a serve of avocado on toast. Simple, yet full of flavour.
This recipe is: vegan, nut-free, sugar-free & gluten-free. Images of assembled breakfast with eggs are obviously not vegan.
Marinated Mushrooms – 1 small bowl
Ingredients:
- 2 cups button mushrooms, quartered (or your preferred mushroom)
- 1/2 large red onion, diced
- 1 clove of garlic, finely chopped
- 1/4 cup fresh basil, chopped + extra to garnish
- 1/4 cup good virgin olive oil + extra few Tbsp’s
- 1/4 cup apple cider vinegar
- Salt & Pepper, to taste
Directions:
- Heat a saucepan to very high heat, it needs to be steaming hot.
- Add the olive oil to the pan, and the mushrooms. Let them sizzles for a few minutes to draw out the water.
- Add the red onion, garlic and a bit of salt & pepper, saute for 2-3 minutes, until the mushrooms has a golden colour.
- Add the apple cider vinegar, make sure your pan is still very hot at this point as we want to burn off the acidity.
- Add a few extra tbsp’s of olive-oil to the edges of the pan, and leave for 4 minutes to cook.
- Add the basil and toss.
You can either eat these hot, or leave them in the fridge to marinate further for 24-72 hours. Enjoy :)

The post Marinated Mushrooms (V) (DF) (GF) (NF) (SF) appeared first on Caroline Høgh Groth.
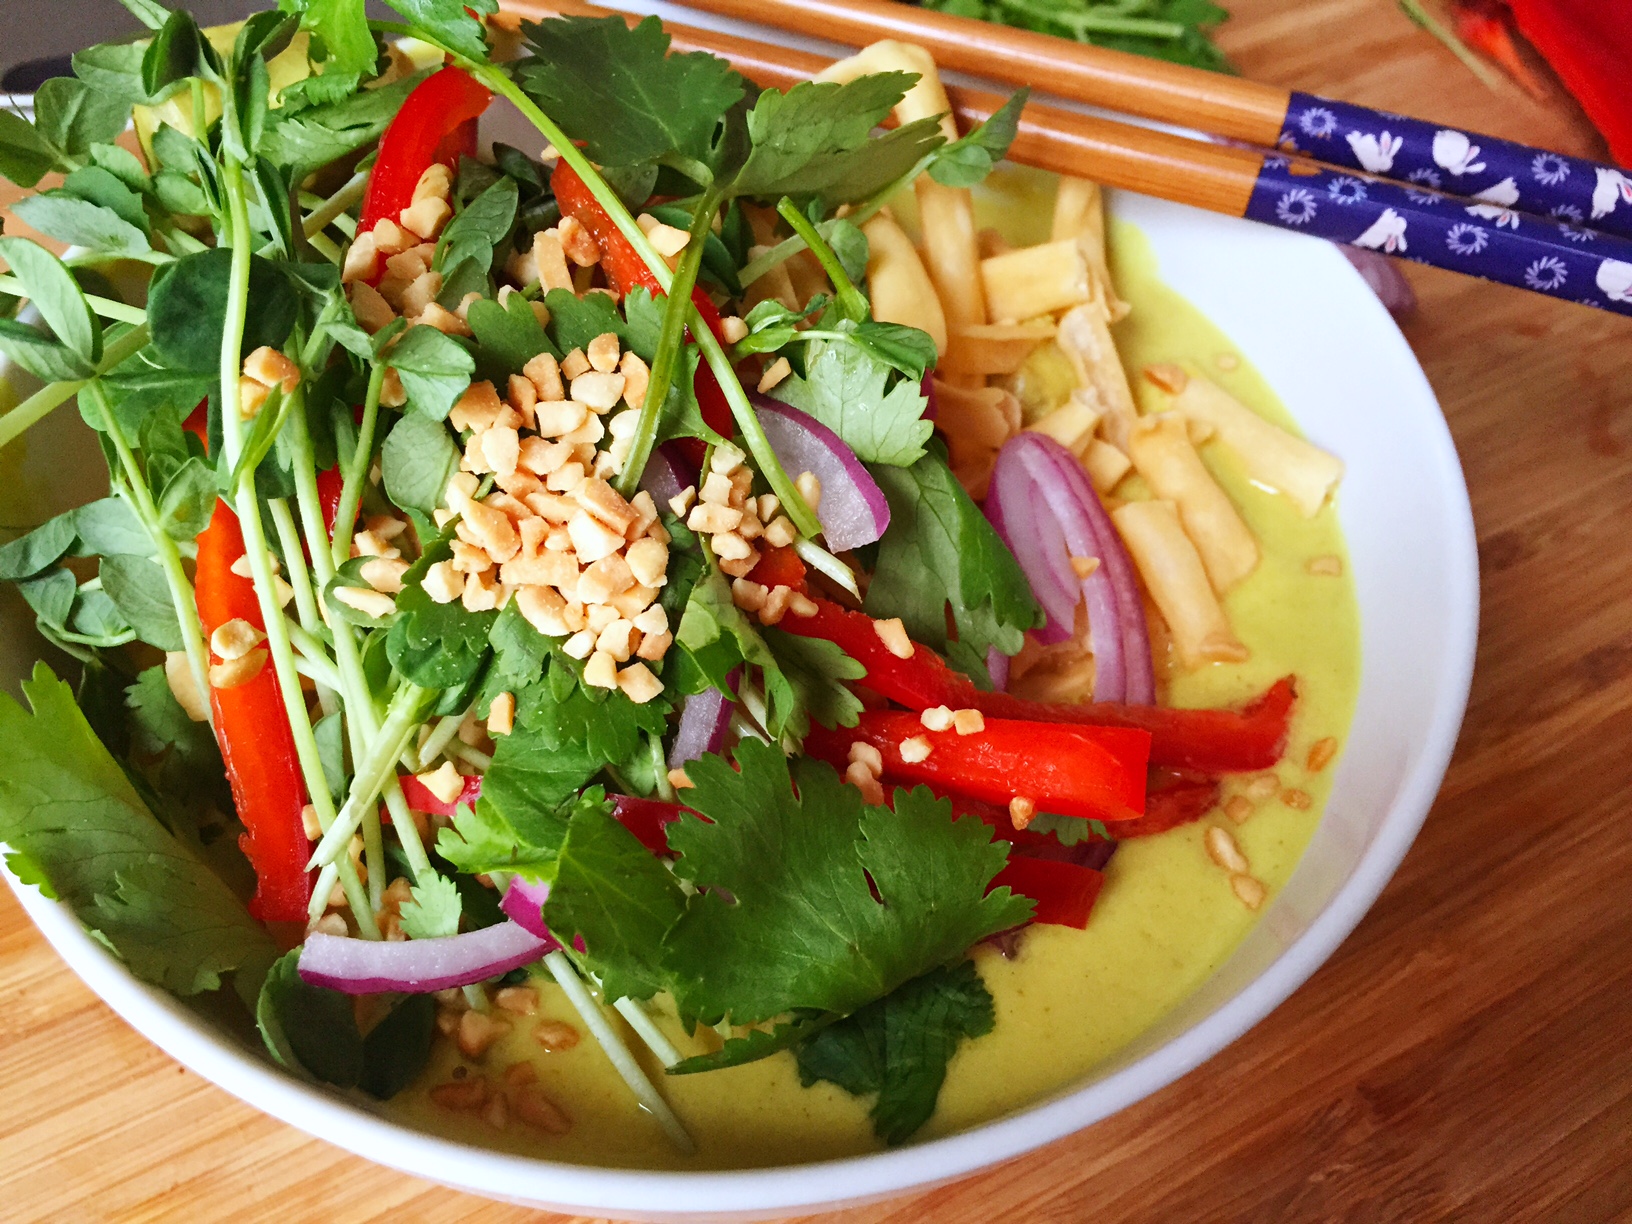
]]>The post Chiang Mai Noodle Curry (GF) (DF) appeared first on Caroline Høgh Groth.
]]>Browsing through the menu we stumbled upon a dish called ‘Chiang Mai Noodle Curry’ and was intrigued to try this dish neither of us had ever eaten. Oh boy, am I glad we did!
It was a delicious bowl of turmeric, curry, crunchy, soft, fresh goodness. So many layers of flavours, I’m almost certain it would be impossible to ever get tired of this dish!
So, the next day I, clearly, already had withdrawals, but Manly is not just a hop, skip & a jump and getting it delivered would be out of the question, so I had to go with the next best thing; cook it myself!
A traditional Chiang Mai Curry Noodle dish is based on a yellow or red chilli paste, however I’m not a fan of spicy & hot so I based mine on a homemade green curry-paste that’s a little bit easier on the ‘hot’-scale. If you don’t have time to make your own paste, it’s easy to pick up a quality curry-paste from your supermarket, but it really does taste better if you can put it together yourself at home.
Serves 2
Ingredients:
Paste:
- 2 long green chillies (mild)
- 1/2 small red onion, chopped
- 3 garlic cloves, minced
- 2cm piece of galangal, peeled & grated
- 1/2 cup fresh sweet thai basil
- 1/2 cup fresh coriander
- 1 tsp ground cumin
- 1 tsp ground coriander
- 1/2 tsp ground pepper
- 1/2 tsp shrimp paste
- 2 tbsp fish sauce
- 2 tbsp palm sugar, grated
- Juice of 1 small lime
- Water
Curry:
- 1 can coconut cream
- 1 can coconut milk
- 2 tbsp homemade green curry paste
- 1 tbsp ground turmeric
- 1/2 tbsp korma curry powder
- 1/2 cup vegetable stock
- 1 tbsp coconut flour (or any other flour you like/have available)
- 1 tbsp brown rice malt syrup
- 2 tsp soy sauce
- 1 tbsp fish sauce
- 1 pack fresh egg noodles
- 2 handfuls of crunchy fried noodles (or make them yourself – I was lazy!)
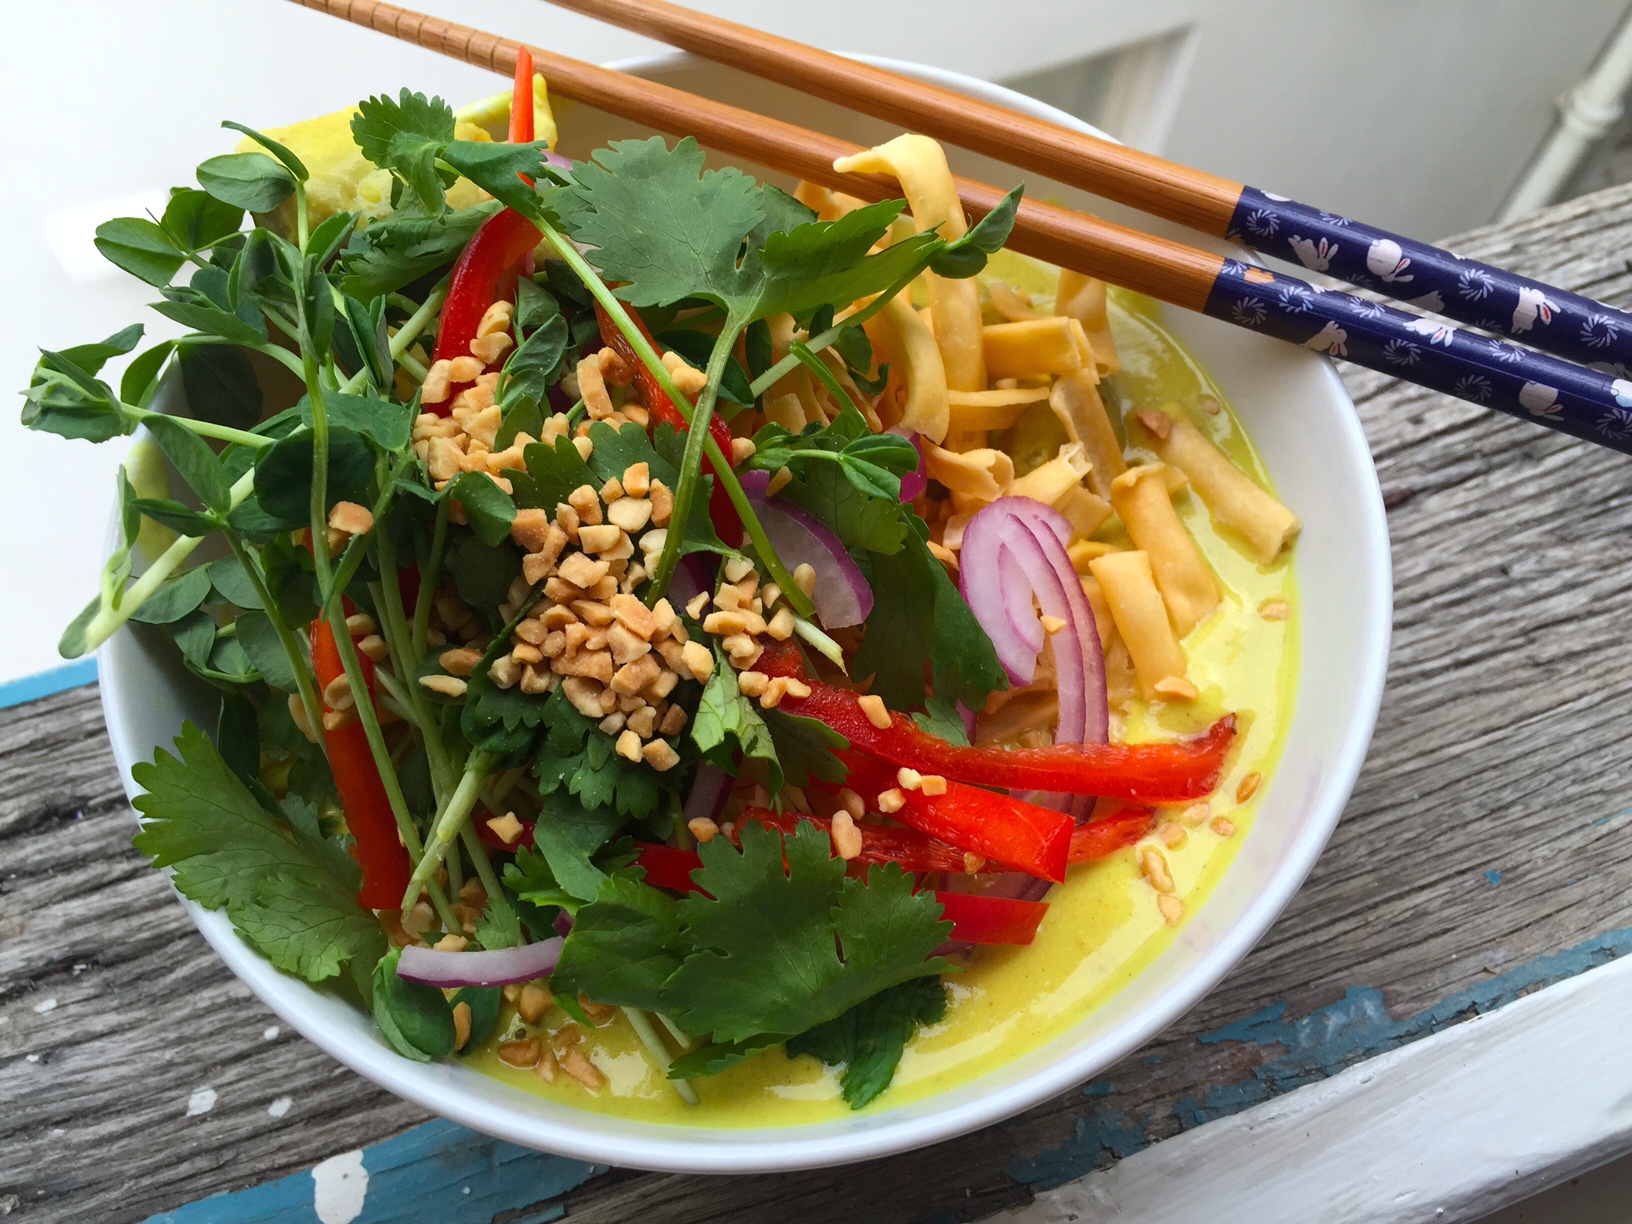
- To garnish; slices red onions, sliced red capsicum, snow sprouts, crushed peanuts, fresh coriander
Directions:
Paste:
- Throw all ingredients together in a food processor and process until you reach a paste-consistency. Only add a little bit of water to get the blending of the ingredients going. It needs to be a thick paste.
Curry:
- In a large sauce-pan on high heat, add 1/2 can of coconut cream and let it bubble for about 1 minute. Add the curry-paste and mix together, leaving it on high heat for about 2 minutes.
- Add the vegetable stock, ret of coconut cream, coconut milk, rice malt syrup, soy sauce & fish sauce and bring to a boil. Add the curry powder & ground turmeric.
- Let it simmer for about 15 minutes until the curry thickens. Add the coconut flour and whisk so it doesn’t clump. This will thicken your curry further.
- Bring a large saucepan with water to the boil and boil the fresh egg-noodles as per package-instructions. Drain, set aside.
- Divide the egg noodles between two bowls, ladle the curry over the noodles, add a handful of fried noodles on top, garnish with red onions, red capsicum, snow sprouts, fresh coriander and crushed peanuts.
ENJOY :)
The post Chiang Mai Noodle Curry (GF) (DF) appeared first on Caroline Høgh Groth.
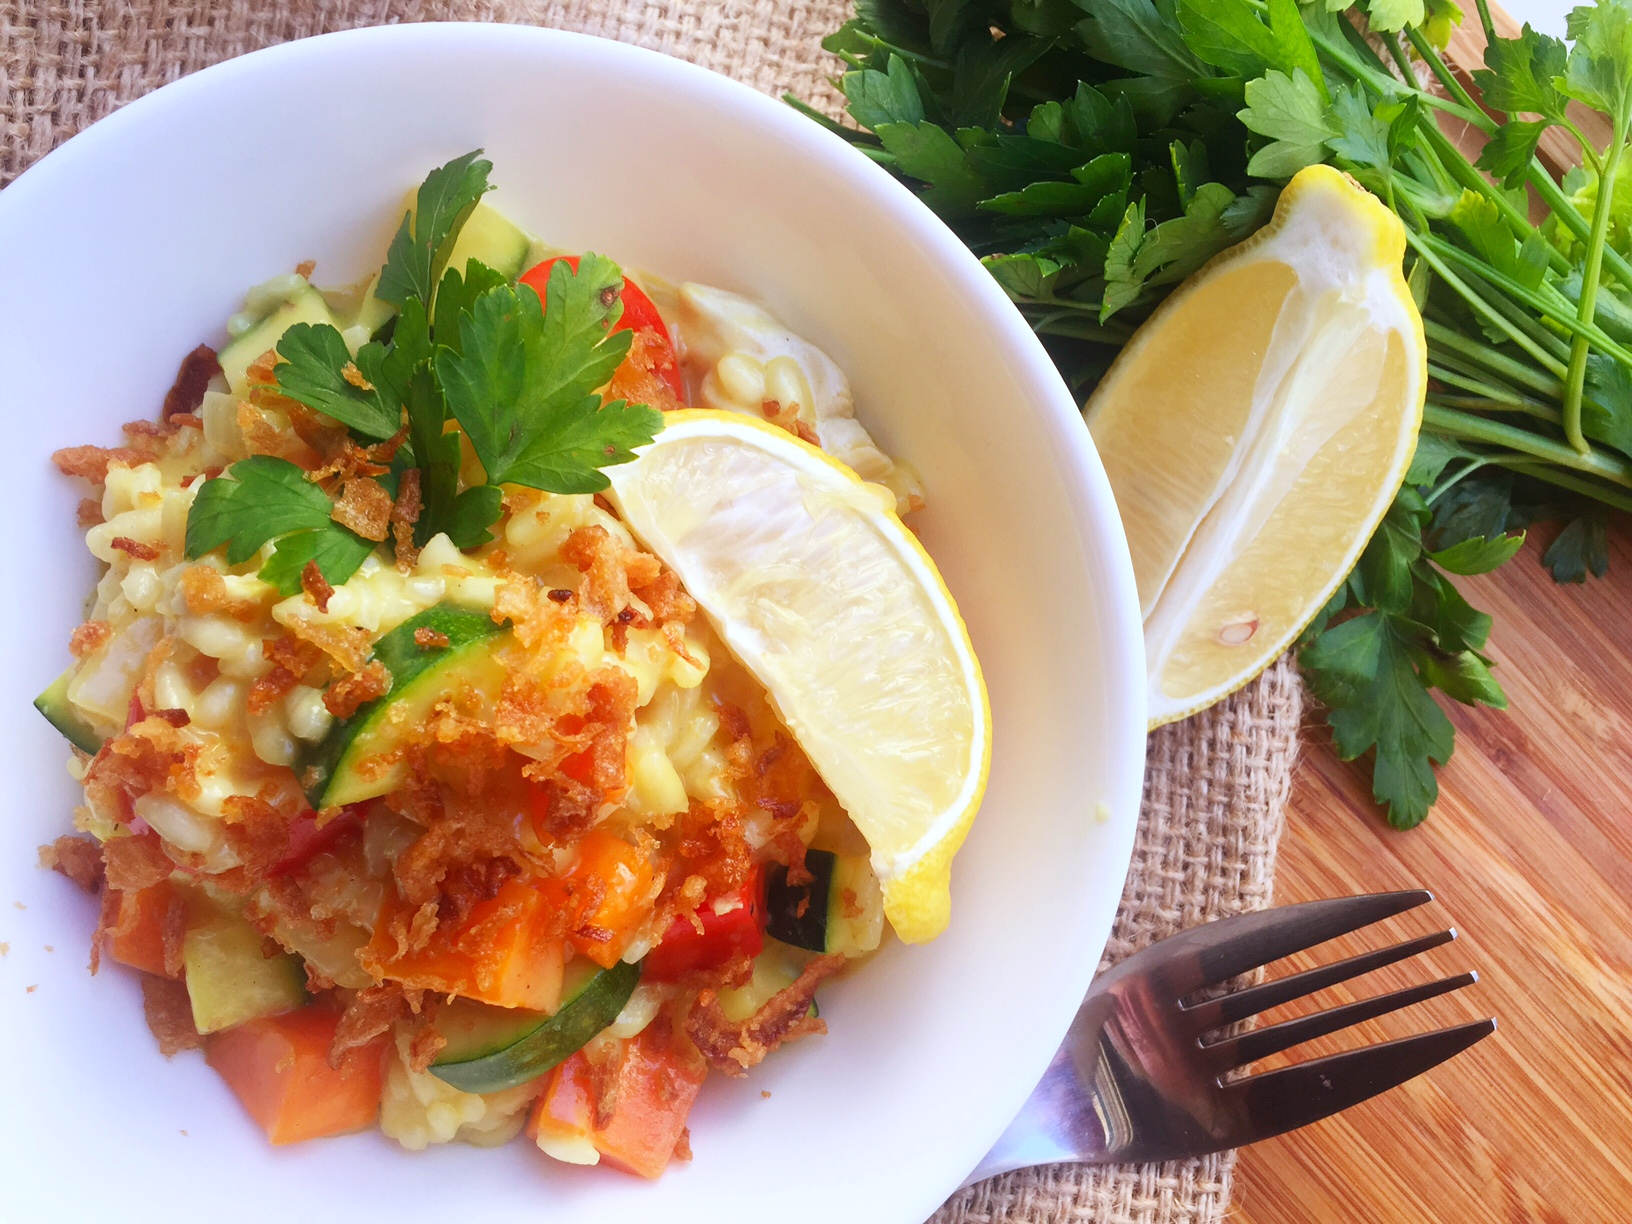
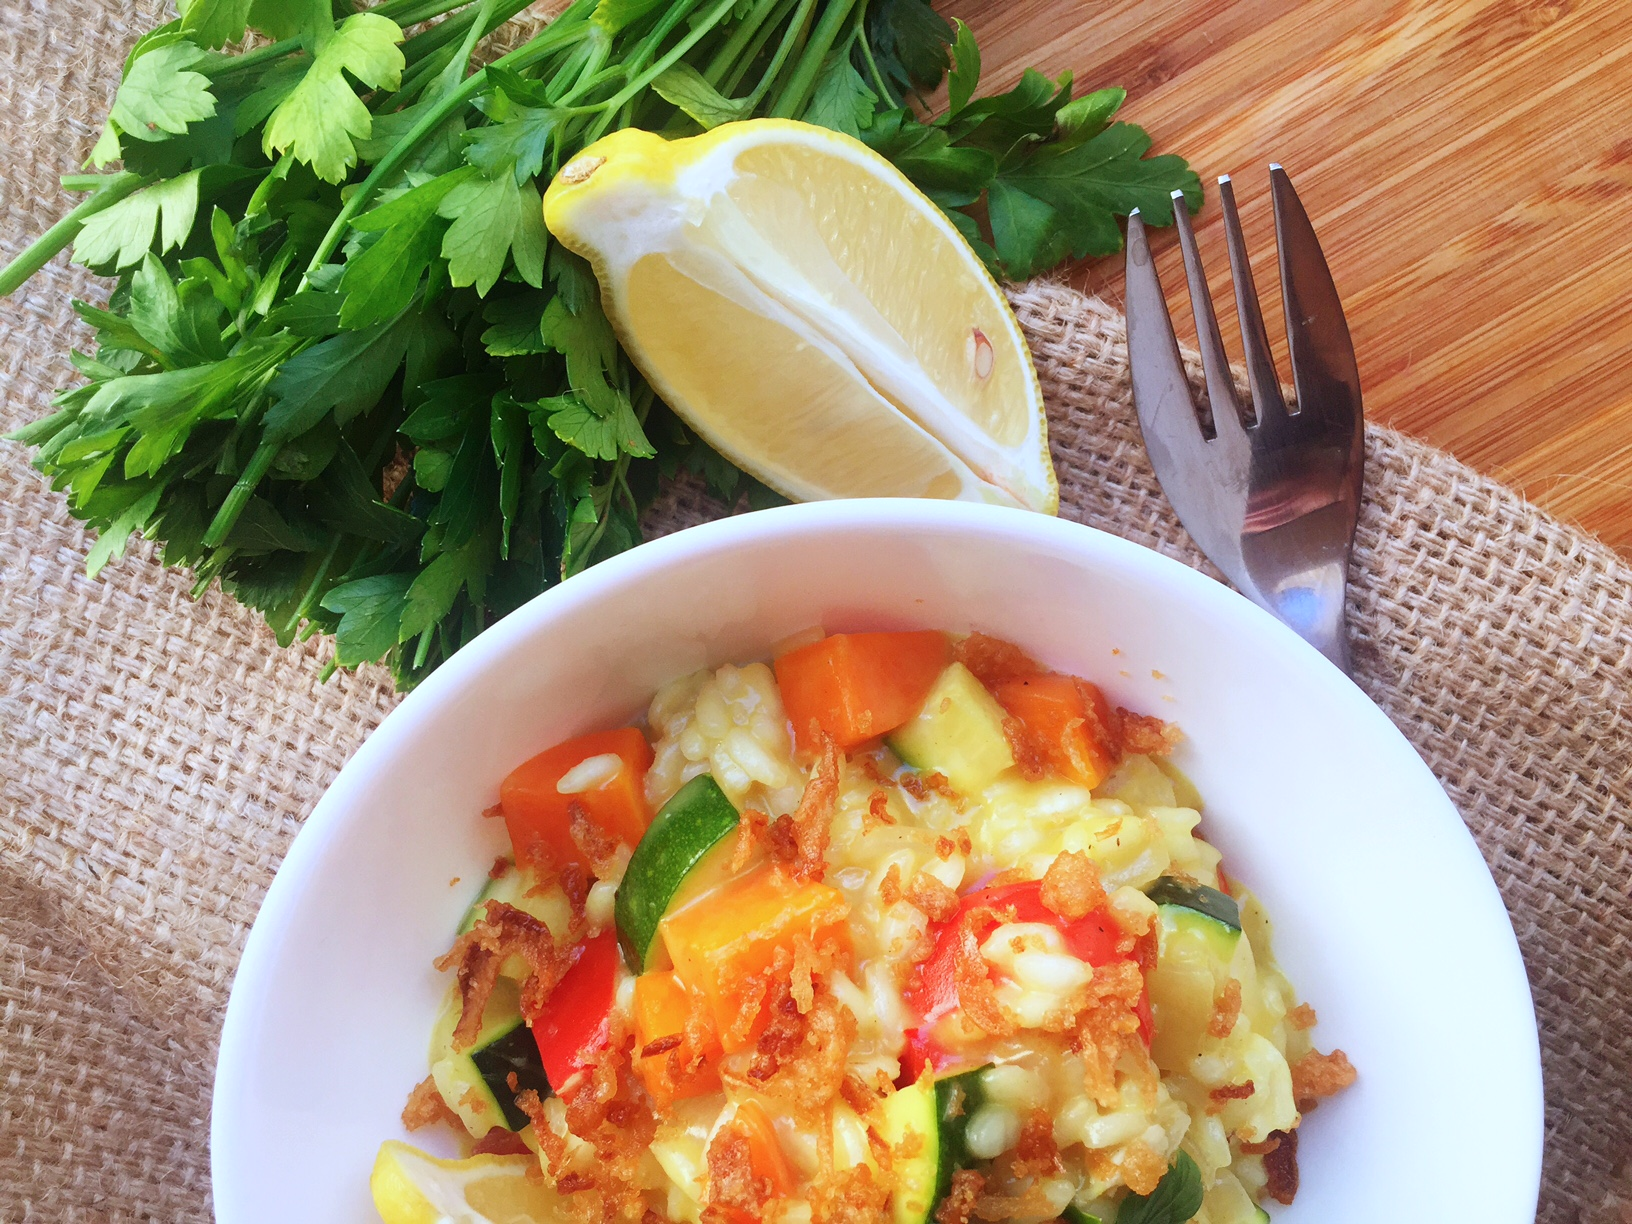
]]>The post Pad Thai Coconut & Barley Risotto appeared first on Caroline Høgh Groth.
]]>But, Pad Thai is commonly known as a noodle-dish. How bout a spin on this so that we make it into a pad-thai risotto? So when you feel like that creamy (normally calorie and fat-filled!) risotto, swap it with this one for a spin on the flavors without losing the creaminess of the dish, but without the massive guilt.
Reserve this for a treat night, it’s still a rather carb(y) dish, so don’t eat 3 bowls of this if you’re trying to watch your weight :)
This dish is not suitable for vegetarians, unless you leave out the fish-sauce and is also gluten & refined sugar-free.
Serves 4.
Ingredients:
- 1 tablespoon coconut oil
- 1 onion, finely chopped
- 2 garlic cloves, crushed
- 1 1/2 cup Barley, rinsed
- 2 cups vegetable stock
- 1 can full-fat coconut cream
- 1/2 red capsicum, chopped
- 1 small zucchini, chopped
- 1 medium carrot, chopped
- Chopped parsley, fried shallots and lemon to serve
Pad Thai sauce:
- 1/2 cup tamarind concentrate
- 2 tbsp brown rice malt syrup
- 1/4 cup vegetable stock
- 1 tsp fish sauce
- 1 tbsp tamari
- 1/2 tsp dried chilli
- 1 tbsp lemon or lime juice
Directions:
- Whisk Tamarind Concentrate and rice malt syrup in a medium sauce pot over medium heat until sugar dissolves. Add Fish Sauce, tamari, stock and dried chilli. Bring heat to high, boil for 30 seconds then remove. Taste the sauce. Add lemon or lime juice.
-
Heat coconut oil in a large pot to a medium heat – add the onion, chilli and garlic. Cook, stirring for 3 minutes until the onion is soft, then add the barley and Pad Thai paste and cook, stirring to coat the grains, for a further 1 minute.
-
Add the stock along with the chopped vegetables. Bring to a simmer, then cover with a lid and cook until all liquid is almost absorbed and the rice is tender, but still with a little bite to it. Add the coconut cream and cook for a further 10 minutes.
-
Top risotto with parsley, fried Asian shallots and lemon wedges and serve.
The post Pad Thai Coconut & Barley Risotto appeared first on Caroline Høgh Groth.
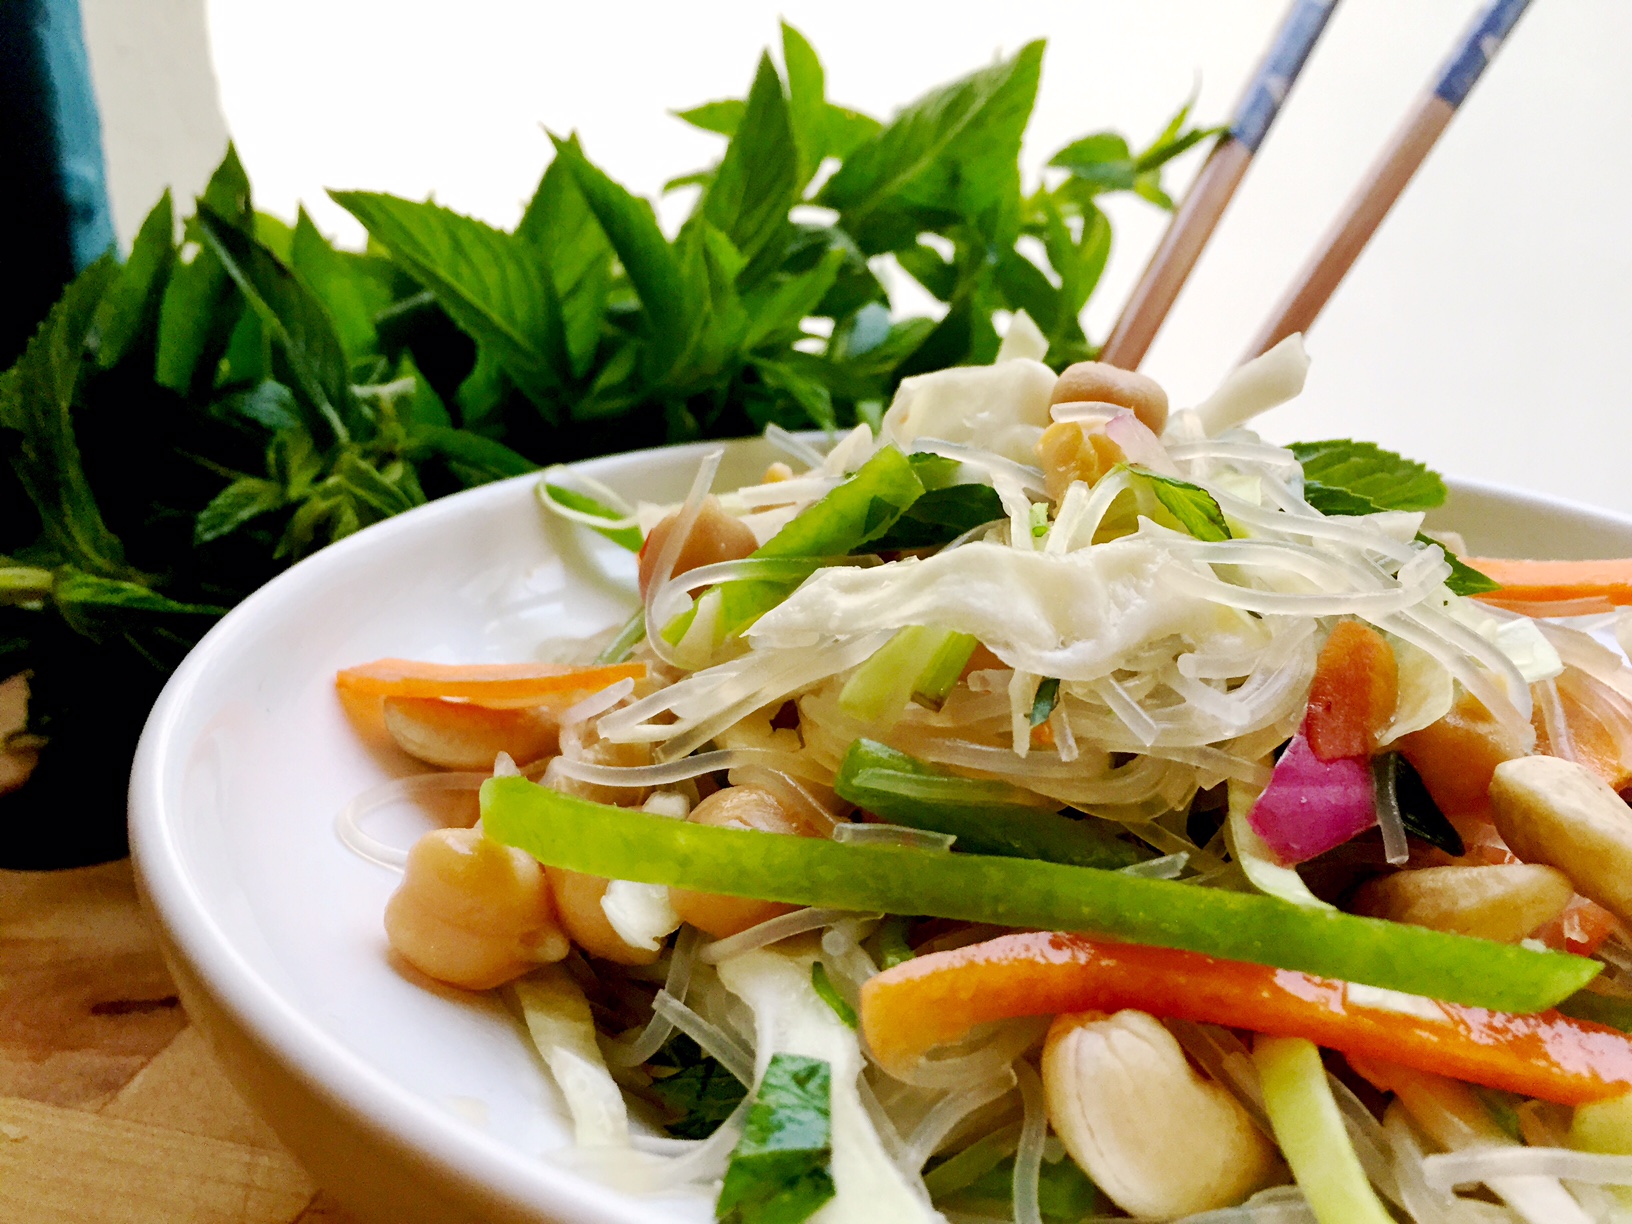
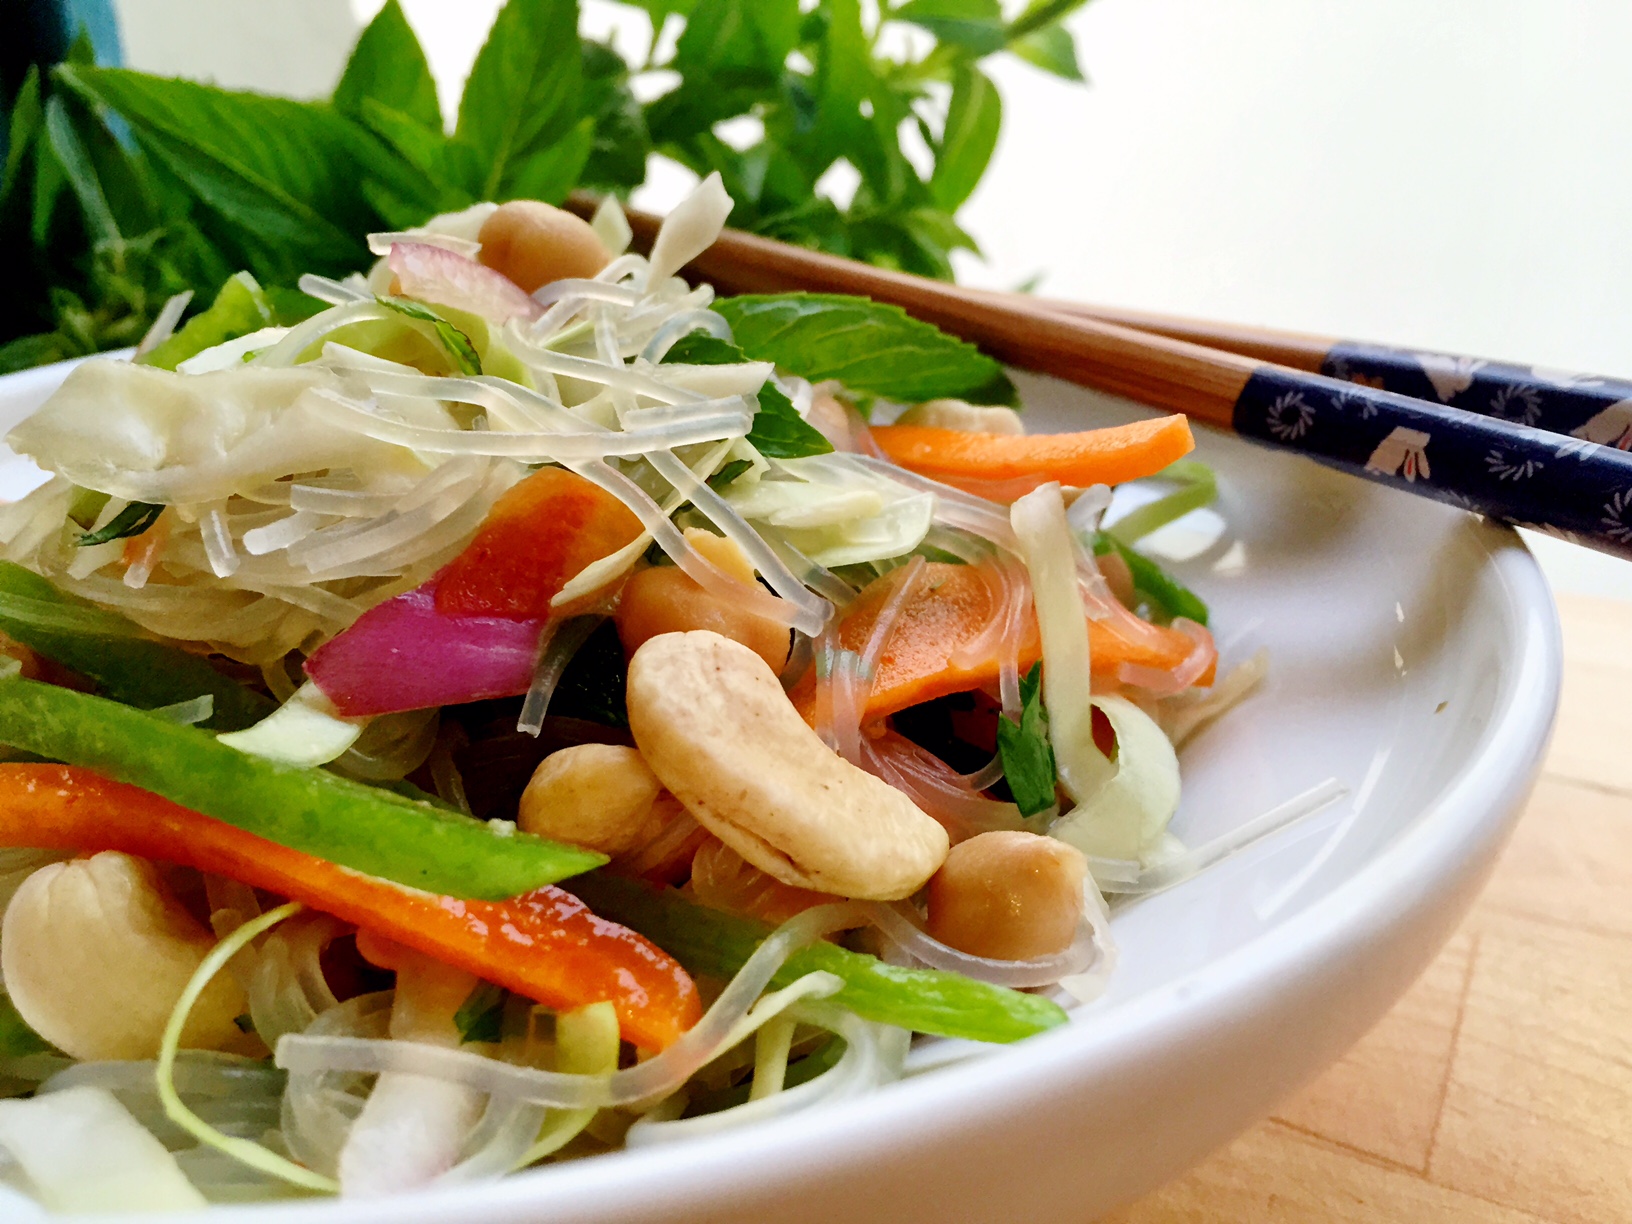
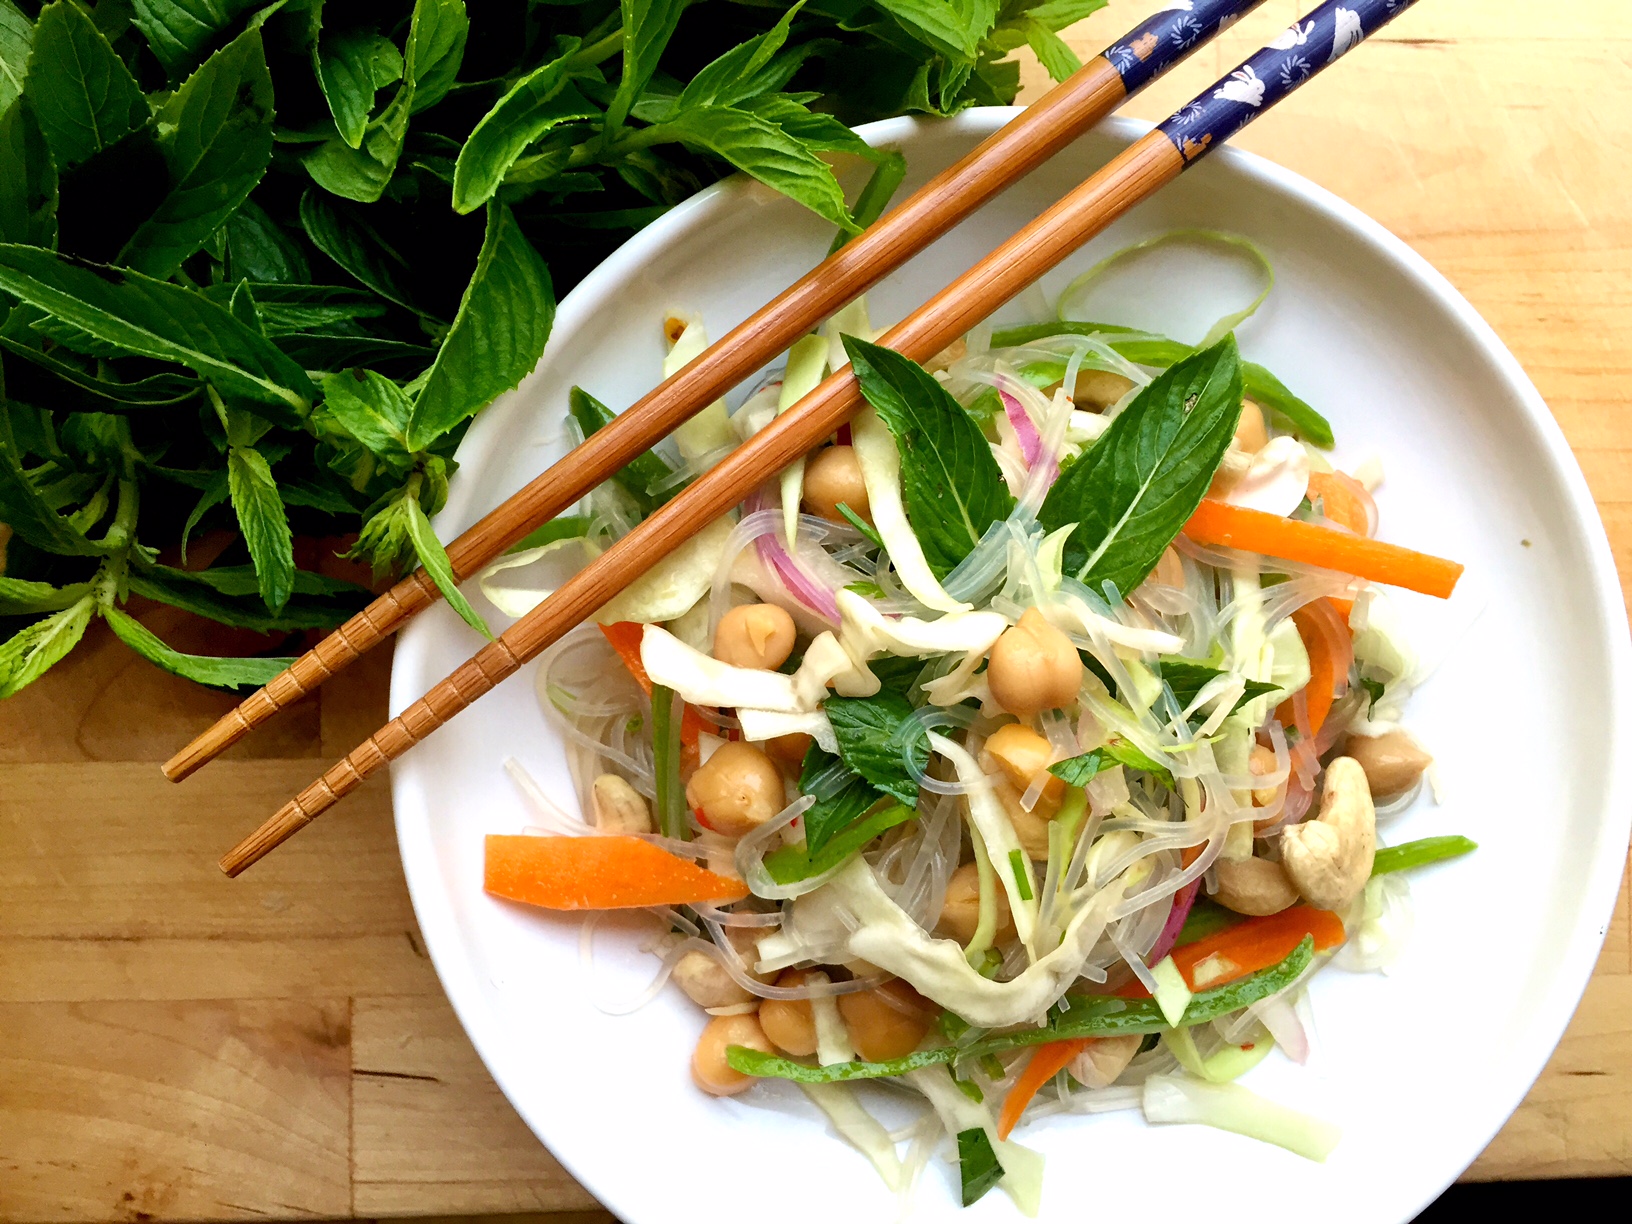
]]>The post Vegan Cabbage & Bean Vermicelli Noodle Salad appeared first on Caroline Høgh Groth.
]]>Either way, my Vietnamese love-feast continues. I hope you share my love for this cuisine? :) One of the reasons why I love Vietnamese/Asian so much is because of the freshness of the food. It’s so vibrant with the vegetables and gorgeous flavours, it all comes together on a higher level. Not to mention, it’s normally quick and easy to whip up because the produce speaks for itself and don’t need much cooking time at all. My goal with my cooking is keeping the ingredients and produce as fresh and close to it’s natural state as possible. Because, really, who wants to be spending 2 hours on cooking once they get home from work late at night? I hear ya’ sister!
Vegan, Gluten-free, Diary-free, Refined Sugar-free.
This portion with serve 4 people as a main or 6 people if you have it as a side-salad.
Ingredients:
- 3 cups of shredded white cabbage (you can use wombok or red cabbage, too)
- 1 & 1/2 cup fresh snow-peas, julienne
- 2 carrots, julienne
- 1 medium red onion, halved and sliced
- 1 & 1/2 cup chickpeas, drained
- 1/2 handful fresh mint leaves, chopped
- 1/2 handful fresh basil leaves, chopped
- 1 packet bean vermicelli noodles
- 1 handful raw cashews, chopped
Dressing:
- 4 tbsp virgin olive oil
- 2 tbsp fresh lemon juice
- 1/2 tsp rice malt syrup
- 1 tbsp tamari (gluten-free soy sauce)
- 1 tbsp apple cider vinegar
- 1 tbsp sesame seed oil
Directions:
- In a heatproof bowl, add the bean vermicelli noodles and cover them with boiling water – set aside and leave for 5-8 minutes, or until soft. Drain.
- Chop all the different vegetables and add them to the bean vermicelli noodles. Leave the mint, basil and cashews out for now.
- In a maison jar or airtight container, combine all the ingredients for the dressing and shake well. Add more sweet and/or sour to align the taste to your taste-buds.
- Add the dressing to the bean vermicelli noodles and vegetables, add the basil, mint & cashews and toss well.
- Serve in small bowls as mains, and decorate with fresh mint leaves and a few extra chopped cashews.
Enjoy :)
The post Vegan Cabbage & Bean Vermicelli Noodle Salad appeared first on Caroline Høgh Groth.
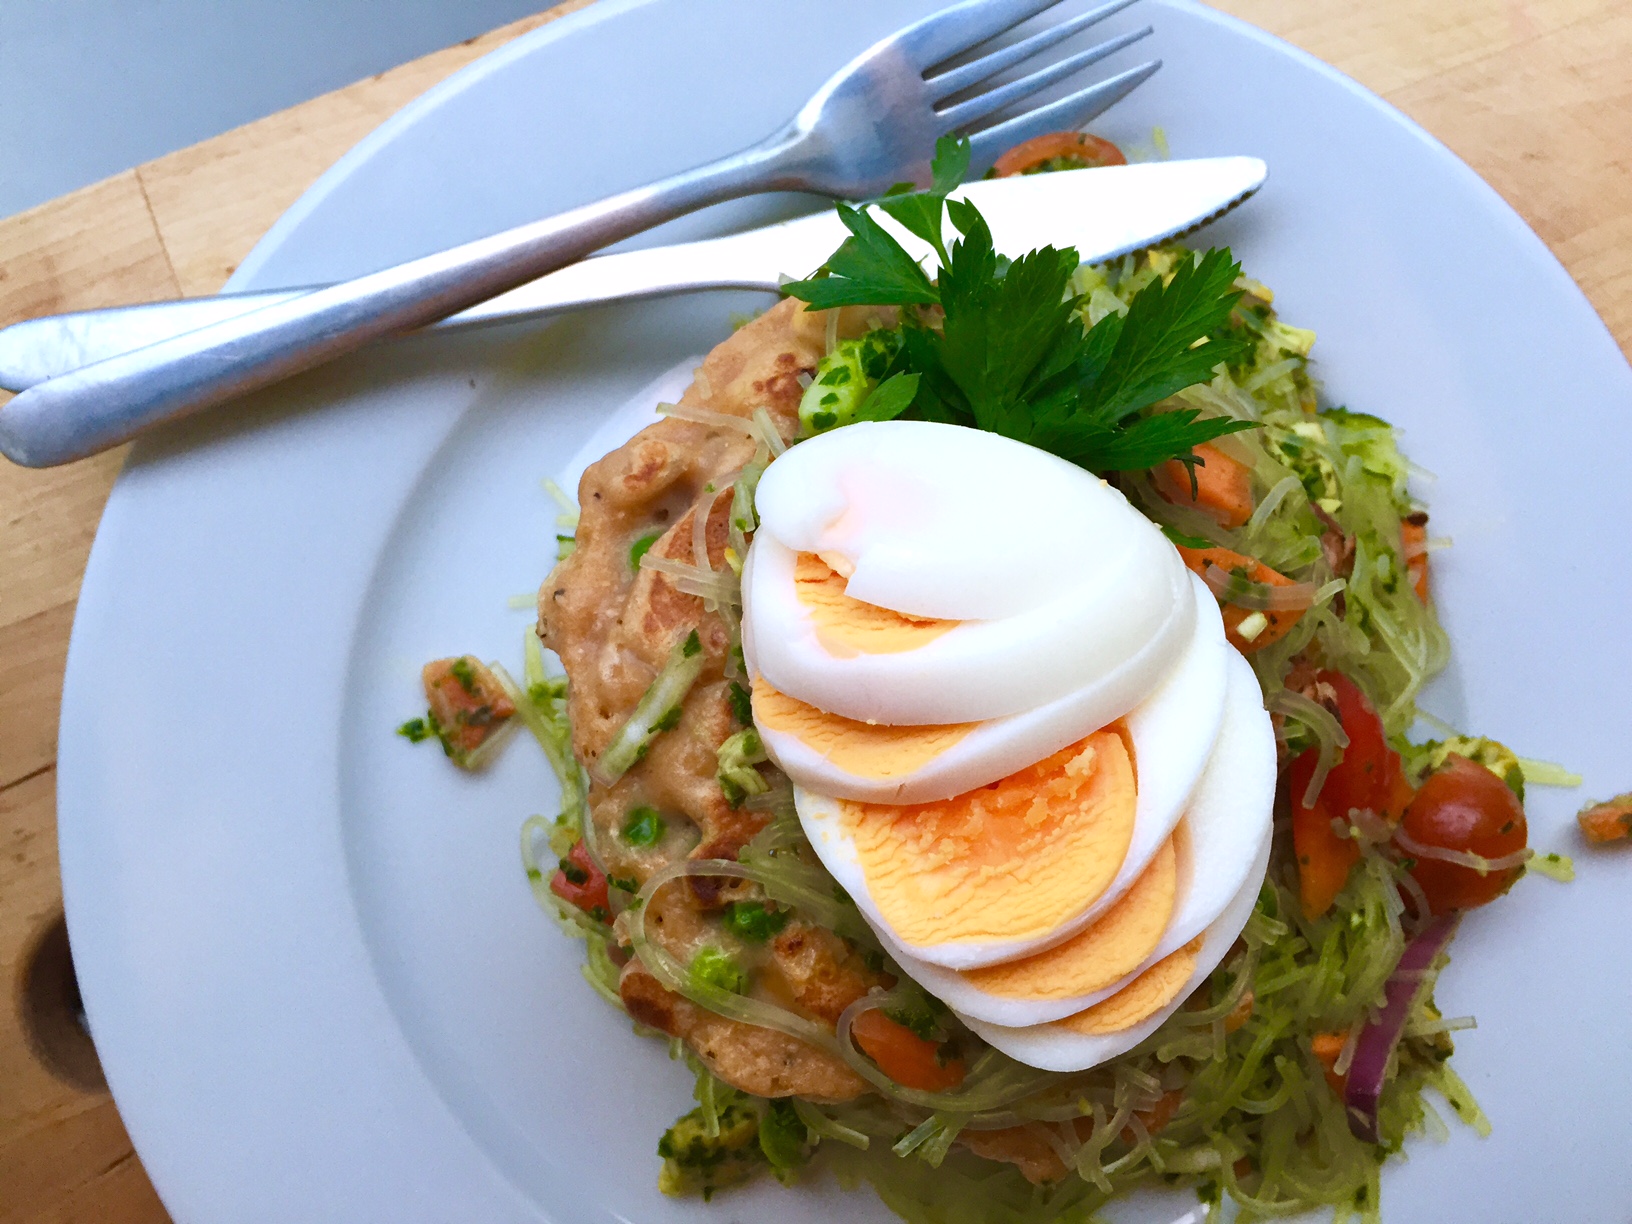
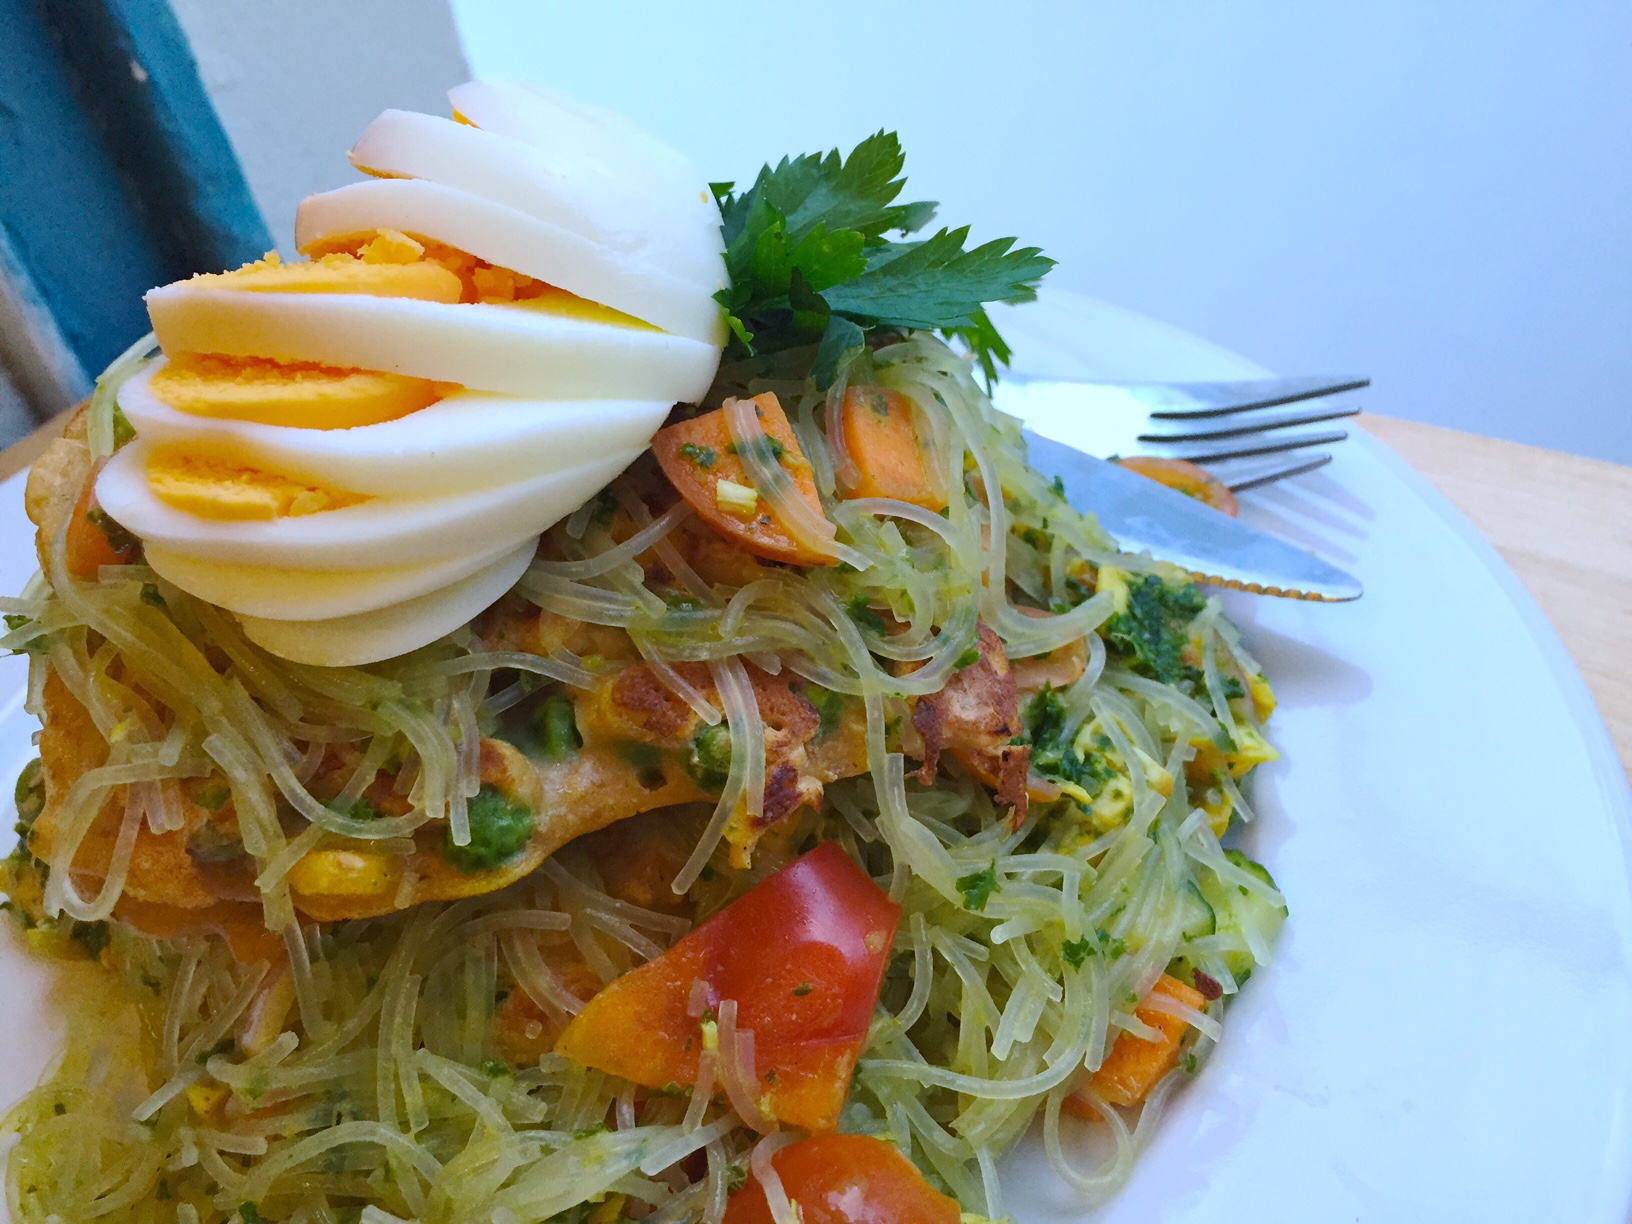
]]>The post Pea, Corn & Chickpea Fritters w/ Vietnamese Noodle Salad (V) (GF) (SF) (NF) (DF) appeared first on Caroline Høgh Groth.
]]>Both suitable for breakfast and/or dinner – if you want to cook them for your hubby or boyfriend, perhaps cook up some bacon or some extra eggs for their protein-hit.
This recipe is vegetarian – if you need to make it vegan then leave the egg out, and substitute it with another binder like a 1/2 banana
Vegetarian, Gluten-free, Sugar-free, Soy-free, Nut-free, Dairy-free
6 fritters:
- 1/2 cup blanched peas
- 1/4 cup corn
- 1/4 cooked chickpeas
- 1/4 cup coconut flour
- 1/4 cup brown rice flour
- 1 whisked egg
- 1/2 cup almond milk
- 1 tsp paprika
- 1 tsp turmeric
- 1/2 tsp cumin
- 1/4 tsp sea salt
- 1/4 tsp black pepper
Noodle Salad:
- 1 packet bean vermicelli (250g)
- 1 carrot, finely chopped
- 1 red capsicum, finely chopped
- 1 small lebanese cucumber, finely chopped
- 1/2 red onion, finely chopped
- 100 g cherry tomatoes, quartered
Dressing:
- 5 kale-leaves, de-stalked
- 2 cloves garlic
- 1/2 avocado
- 1 handful parsley (with stalks)
- Juice of 1/2 lemon
- 3 tbsp tamari
- 2 tsp sesame oil
- 2 tsp virgin olive oil
- 1/4 cup coconut milk
- 1/4 cup water
- Pepper
Extra:
- Soft-boiled eggs
Directions:
- In a large bowl, mix together coconut flour, brown rice flour, all spices, egg and milk and mix until you form a batter. Add the peas, corn and chickpeas and set aside in the fridge for 10-15 mins.
- Boil some water and cover the bean vermicelli with it. Set aside until soft (about 4-5 mins) then drain. Chop all vegetables and add to the vermicelli noodles.
- To make the dressing add all ingredients to a blender and blend until finely chopped and it has all come together. Drizzle over the vermicelli salad and toss until all is well combined.
- Heat a frying pan on low-medium heat with coconut oil and add batches of 2 tbsp’s of the batter to the pan. Fry on each side for about 2 mins.
- Serve like this: Fritter, salad, fritter, salad, fritter, salad and top with a soft-boiled egg and some extra parsley.
ENJOY :)
The post Pea, Corn & Chickpea Fritters w/ Vietnamese Noodle Salad (V) (GF) (SF) (NF) (DF) appeared first on Caroline Høgh Groth.
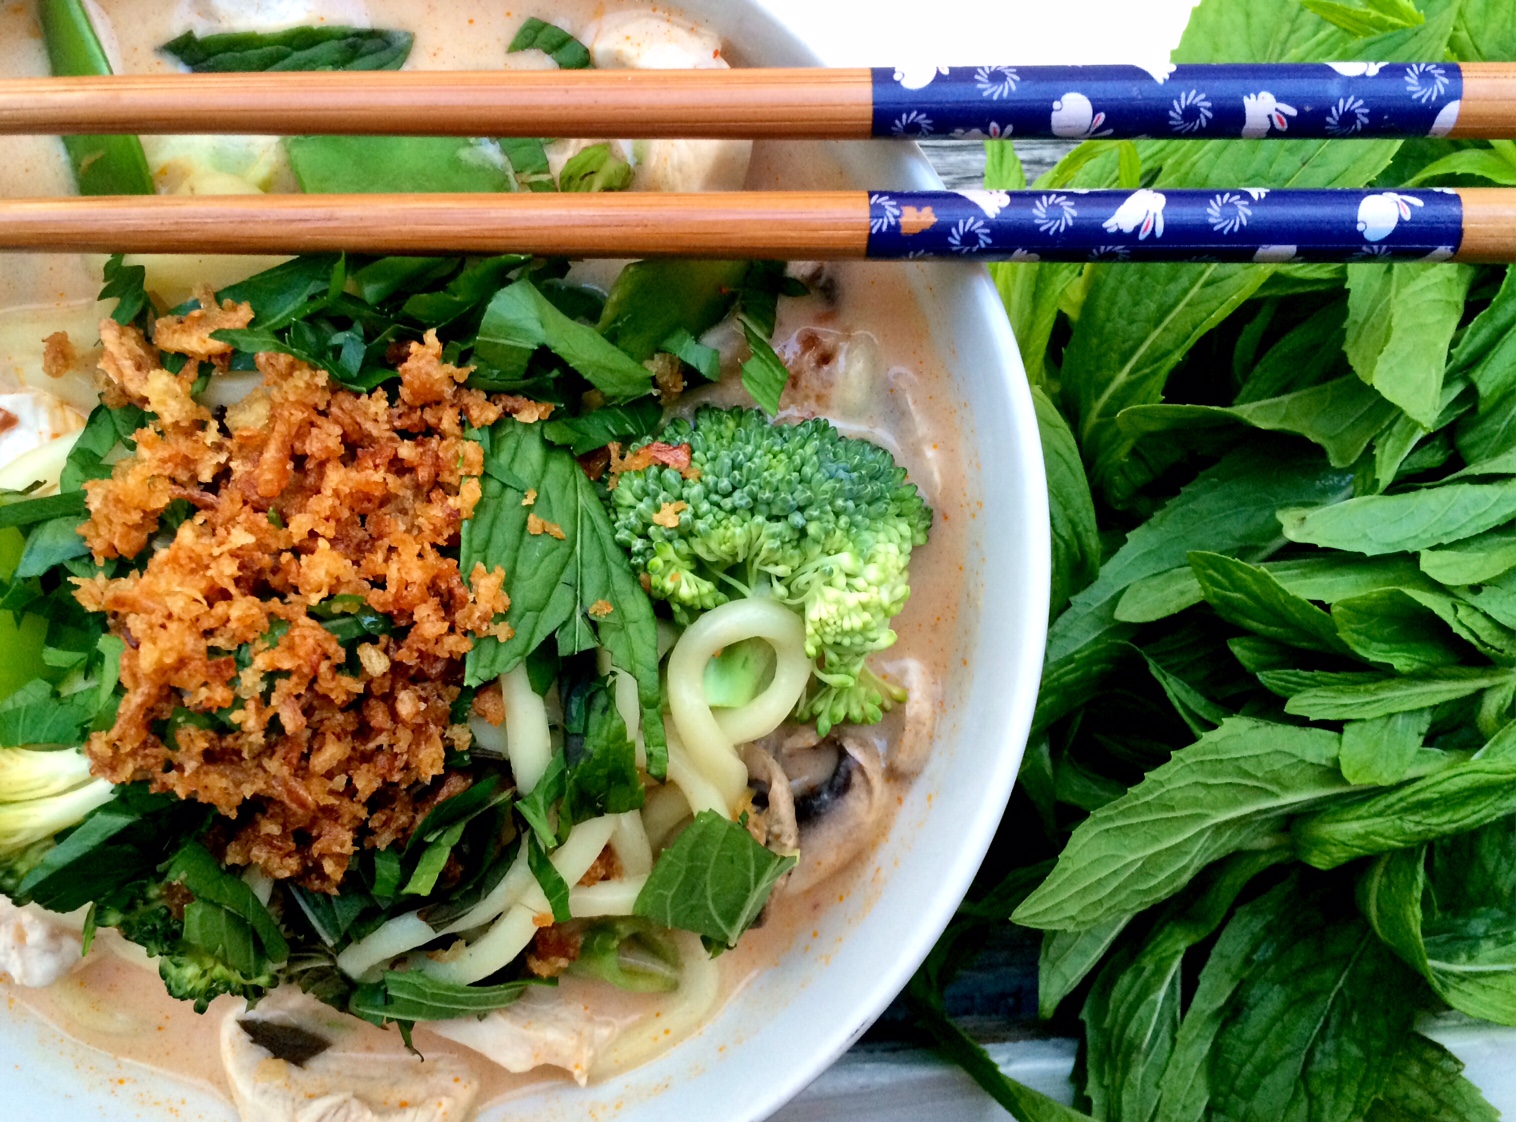
]]>The post Vegan Laksa with Rice Udon Noodles appeared first on Caroline Høgh Groth.
]]>So, when I was still on a liquid diet, but could start to eat a bit more soft food, I thought it was time to come up with a delicious, creamy, sweet, tangy, sharp, hot VEGAN LAKSA! Yay. I’m so excited about this one. I hope you like it!
This portion will serve 4 people, it’s vegan, gluten-free, sugar-free, dairy-free and deliciously healthy.
Ingredients:
Laksa Paste
- 4 fresh red chillies, medium sized (leave seeds for more heat)
- 3 cloves garlic
- 1 thumb-sized piece of ginger
- 2 tsp of ground cumin
- 1/4 thumb piece galangal (remember to peel)
- 1 small red onion chopped
- 1 lemongrass stalk, use white part only, chopped
- 1/2 bunch coriander (cilantro) roots
- 1 tbsp sesame oil
- Juice & zest of one lime
- 1/2 tsp rice malt syrup
The rest:
- 1 & 1/2 cans of organic coconut milk
- 3 cups vegan vegetable stock
- 2 packs of rice udon noodles (can substitute for any noodles you like)
- 1 cup button mushrooms, sliced
- 1 cup broccoli
- For topping: fried shallots, fresh mint and coriander
- Coconut Oil
Directions:
- Toss together all ingredients in a food processor and process the paste until it forms a thin, even paste.
- In a large pot, heat 1 tsp of coconut oil over medium heat. Add the laksa paste and cook the paste for about 2-3 minutes to get all the flavour going.
- Add the vegetable stock and the coconut milk and allow it to heat until it boils. Turn down the heat.
- Add the rice udon noodles, mushrooms, and broccoli and leave for 2-3 minutes until all is tender, but still has a bite to it.
- Divide the soup between 4 bowls and top with fried shallots, fresh mint & coriander.
ENJOY! :)
The post Vegan Laksa with Rice Udon Noodles appeared first on Caroline Høgh Groth.
]]>